15.3.2.4 Parameters Tab (Upper Panel)NLFit-Dialog-ParaTab
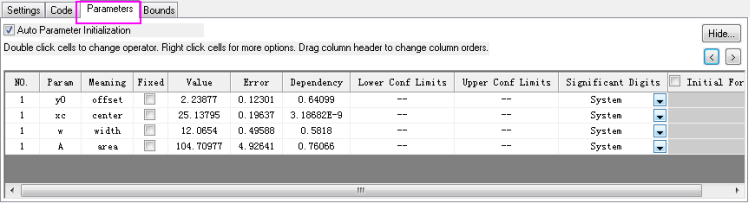
On this tab you can see and set parameter values and significant digits, and control whether parameter values should be varied or fixed during the iterative fitting process. This tab also displays error and other information for monitoring the fitting procedure.
Auto Parameter Initialization check box
Run automatic parameter initialization code for the chosen fitting function.
For all built-in functions, automatic parameter initialization codes are provided. For user-defined functions, this code is optional. If parameter initialization code is not supplied, all parameter values will register initially as missing values (even though Auto Parameter Initialization may be selected). In this case, you must enter estimated values before you can start fitting.
For more details, please see Parameter Initialization.
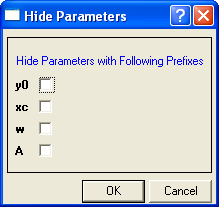
Hide button
Click this button to open the Hide dialog. Selected parameters are hidden in the parameter table. This may be useful while manipulating initial parameter values or formats. Hiding a parameter does not remove it from the fit process.
Previous button and Next button
The  and and  buttons will only be activated after clicking 1 Iteration or Fit until converged button. It will help user compare parameter values, fixed status and bounds between each 1 Iteration or Fit until converged click. buttons will only be activated after clicking 1 Iteration or Fit until converged button. It will help user compare parameter values, fixed status and bounds between each 1 Iteration or Fit until converged click.
For example:
- Fit until converged, then fix one parameter, do fit until converged again; change the fix value and do fit until converged again; and keep flipping back and forth between those stages by the and buttons. Each click is multiple iterations.
- Enter intial parameter values, click 1 Iteration button 3 times; correct a parameter value and its upper and lower bounds, click Fit until converged button; click button, it actually goes back multiple iterations to the stage of corrected parameter value with bounds; then click will go back one iteration at a time till parameter initial values stage. The same applies for button.
Parameter Table
All parameters and properties are listed in tabular format.
 | To have the Parameters table in the result sheet to display Meaning column information, go to the Settings tab and under Advanced > Quantities, check the Meaning box.
|
Context menu brought up by right-clicking any column title
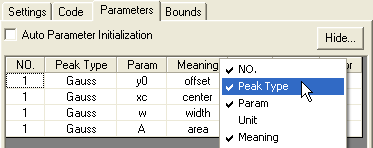
Right-click any column title and use the context menu to display (or hide) parameter properties. Select Show All Columns to display all columns.
These columns correspond to columns in the Peak Fit Parameter dialog.
For details about each column, please see here.
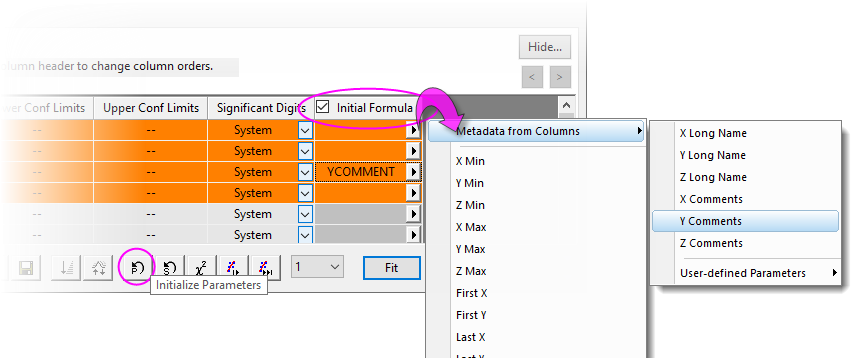
Initial Formula check box
To initialize certain parameters using column label row values or statistics:
- Check the Initial Formula check box.
- Using the the flyout menu available for each parameter, pick the quantity you want to use for initialization.
- Click the Initialize Parameters button to apply your selections.
Context menu brought up by right-clicking the tab title
Right-click the Parameter tab title to open a context menu:

This is the same menu that displays in the Peak Fit Parameter dialog. Please see Peak Fit Parameter Help for details.
Specify Value cell format
Value cells support Numeric, Date, and Time formats.
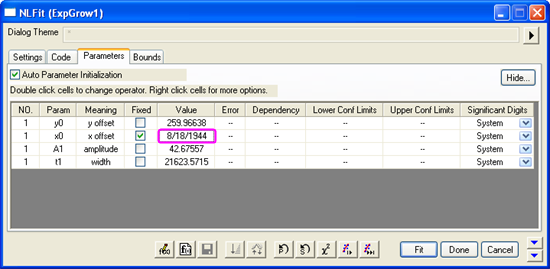
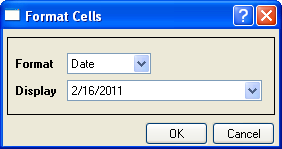
- Right-click the Value cell of a Param in the Parameters tab and select Format Cells from the short-cut menu.
- In the Format Cells dialog, select a format from the Format drop-down list.
- For Date and Time formats, select from the Display drop-down list.
- To use a custom Date or Time format, select Custom Display from the Display drop-down list, and type the format in the Custom Display combo box.
-
- Formats of Lower Bounds and Upper Bounds cells in the Bounds tab can also be specified in the same way.
Named ranges for initial parameter values
Origin 2022b and later support use of named ranges in place of numeric parameter values.
For more information, see this OriginLab blog post on Name Range for Fitting Parameters.
Copy/Paste Parameter Values
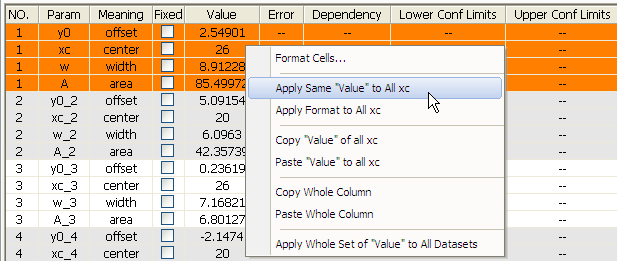
When doing an independent fit for multiple datasets with the same fitting function, you can use the fly-out menu to apply the current value to all similar parameters in other datasets.
For example, as in the above screenshot, right-click the value of parameter xc. Select Apply Same "Value" to All xc from the fly-out menu to apply 26 to the similar parameters, xc_1, xc_2, xc_3 and xc_4. Use this menu to copy and paste the initial values to all paralleled parameters.
Note:
- During the fitting process, if a parameter is Fixed, the parameter value will not change until the check box is cleared.
- The Share check box is available only when global fitting is used.
- The parameter values and the Fixed check box status can be saved in a dialog Theme. For more information, see Fitting with Themes.
- You can also specify these parameter settings when defining a fitting function. This can be done with the Parameter Settings box of the Function Organizer. For more information, see The Fitting Function Organizer dialog box.
- Parameter settings in a dialog Theme are given priority over settings in the function definition file (FDF). When a theme is loaded, the initial parameter values stored with the theme will be used instead of the initial values in the function definition file.
|
|