2.3.3 Origin Rich TextOrigin-Rich-Text
From 2022b, Origin support to use Origin Rich Text syntax in the Notes window.
With Rich Text, the Notes window has two modes -- raw text mode and Render mode. Toggle between these modes using Notes: Render Mode or shortcut key combination CTRL + M.
To add text to the Notes window, you need to be in raw text mode. To style added text, use the Format toolbar and/or apply pre-defined paragraph styles.
 | Zoom in or out of the rendered Notes page using the Zoom combo box  on the Standard toolbar. on the Standard toolbar.
|
Format Text
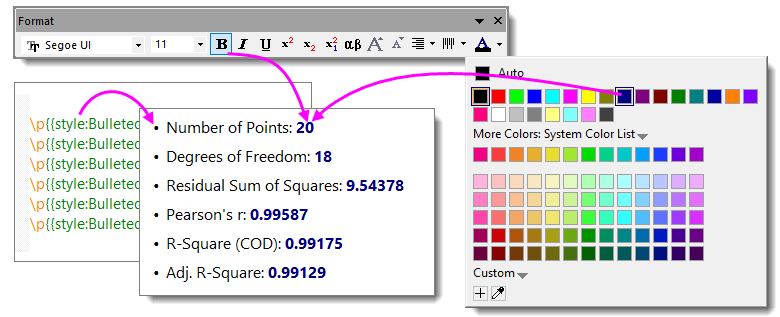
When switch to Origin Rich Text syntax, the Format toolbar buttons (Greek, Super/Subscript, etc.) are available. You can the button to format text in the Notes window.

Besides using the buttons, you also can type following syntax to format text
| Syntax
|
Description
|
Entering...
|
Results in...
|
| \+(text)
|
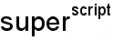
Format text as superscript.
|
super\+(script)
|
|
| \-(text)
|
Format text as subscript.
|
sub\-(script)
|

|
| \=(text1,text2)
|
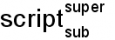
Format text1 as subscript, text2 as superscript.
|
script\=(sub,super)
|
|
| \p%pointsize(text)
|
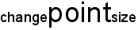
Change the point size of text. 200 doubles the size, 100 results in no change, etc.
|
change\p200(point)size
|
|
| \i(text)
|
Format text as italics.
|
\i(italics)
|

|
| \b(text)
|
Format text as bold.
|
\b(bold)
|

|
| \u(text)
|
Format text as underline.
|
\u(underline)
|

|
| \g(text)
|
Format text in Greek symbols.
|
\g(Greek)
|

|
| \ab(text)
|
Display a bar above text.
|
\ab(X)
|

|
| \ad(text)
|
Display a short line - a dot - above text.
|
\ad(A)
|

|
| \at(text)
|
Display a tilde above text.
|
\at(A)
|

|
| \(ASCII character code)
|
Displays the specified ASCII symbol.
|
\(169)
|

|
\y(')
\y(")
|
Displays a full height prime or a full height double prime. To display it as a combining prime/double prime, use superscript like \+(\y(')) or \+(\y(")).
|
\g(c)\=(3,\y('))
|

|
| \f:fontname(text)
|
Displays text using the fontname font. You can abbreviate fontname, as long as you use enough letters for the name to be unique.
|
\f:Wide Latin(font)
|

|
| \cnumber(text)
|
Displays text in the color located at position number in the Color drop-down lists.
|
\c2(red)
|

|
| \x(unicode number)
|
Display the unicode character.
|
\x(03b8)
|

|
| \sc
|
Insert one conditional horizontal space in a string even there are multiple consecutive spaces.
|
in this example assume @LD3 and @LD4 not exist, so there will be two spaces. \sc make one space only
\b(%(1Y,@LL)\sc%(1Y,@LD3)\sc%(1Y,@LD4)\sc(%(1Y,@LU)))
|
LName (Unit)
|
|
\(text\)
or
\[text\]
or
\q(text)
|
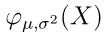
Display LaTex format. From 2025, to display LaTex format, it does not need to put the text inside \q( ).
|
\(\varphi_{\mu, \sigma^{2}}(X)\)
or
\[\varphi_{\mu, \sigma^{2}}(X)\]
or
\q(\varphi_{\mu, \sigma^{2}}(X))
|
|
Note: Some escape sequences may not listed in above table, you can see this page for more.
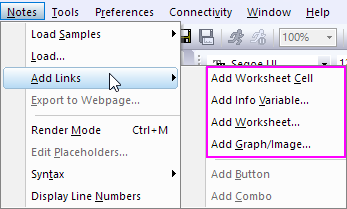
Insert Link
When edit Notes windows by Origin Rich Text syntax, you not only can add graphs, worksheet cells, variables links, Worksheet by Notes main menu or context menu of Notes window, but also can insert Symbol Map, LaTeX Equation, Link, Image from File/Web into Notes.
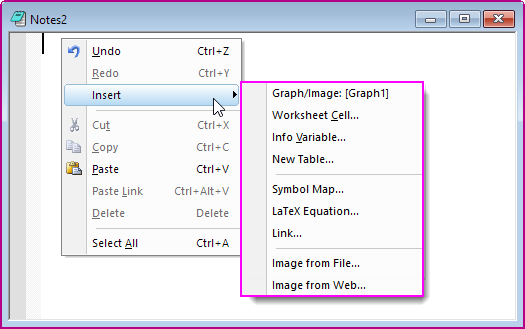
- Context menu of Notes window
Insert Graph
- Select Add Graph/Image option in the Note main menu or window's context menu to add graph links.
The Graph/Image Browser dialog will pop-up, then you select graph you want to insert. By default, the width of the graph is 300. And you can use system variable @IMGA to customize the default width value of graph.
or
- Type the syntax : \img(graph name, w=width value)
- Examples:
\img(Graph1, w=500)
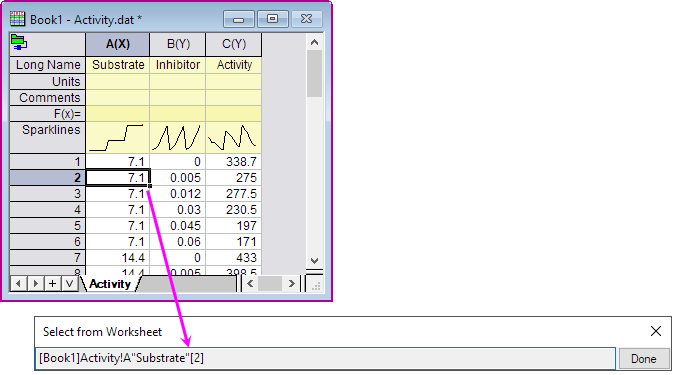
Worksheet cell
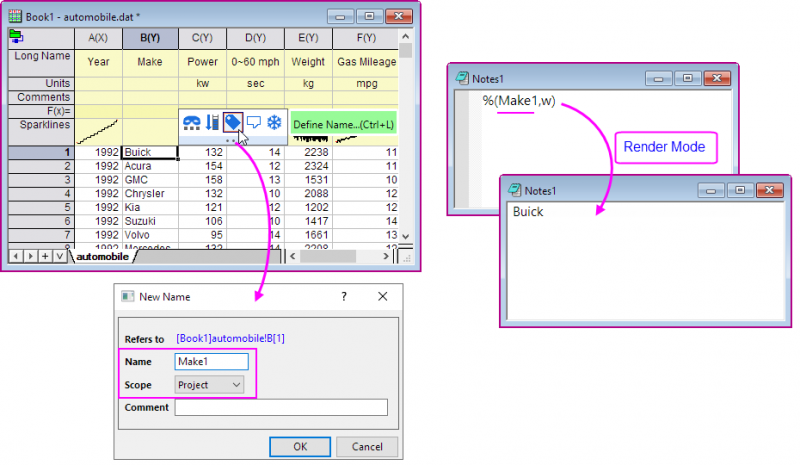
- Select Add Worksheet cell option in the Note main menu or window's context menu to add cell links. The Select from Workstsheet dialog will pop-up, then you click the cell in the Worksheet and then click Done button.
or
- Type the syntax : %([workbookname]sheetname, column, row [,format])
- Examples:
%([Book1]Sheet1!,A,2,W)
- If Worksheet cell is defined name, the syntax can use the name of cell.
- Note: The Scope of the cell name should set to Project.
Whole Worksheet
- Select Add Worksheet... option in the Note main menu. The Sheet Browser dialog will pop-up, then you click the Worksheet to add in the Notes.
or
- Type the syntax : \img([BookName]SheetName)
- Examples:
\img([Book4]Sheet1)
Info Variables
- Select Add Info Variables option in the Note main menu or window's context menu to add variables links. The Insert Variable dialog will pop-up, then you select workbook or matrixbook data or metadata to add in the Notes.
New Table
This opens the New Table dialog for configuring a basic table.
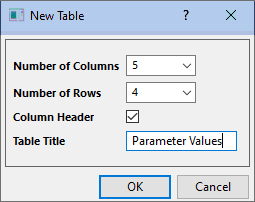
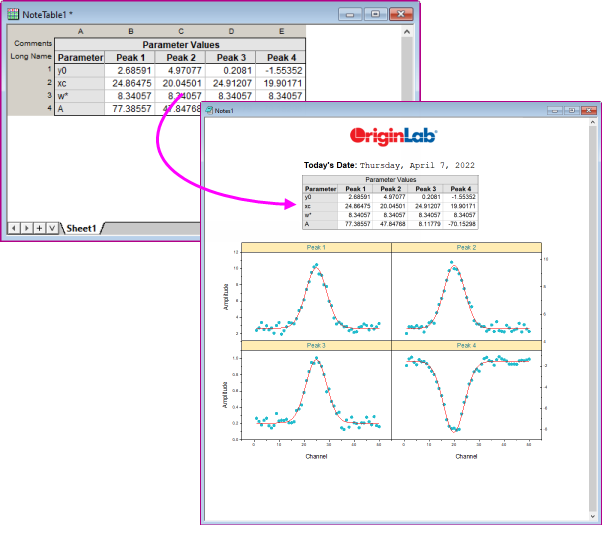
- Specify Number of Columns, Number of Rows, etc. and click OK. A book is created (e.g. NoteTable1) with your table ready for data entry (syntax e.g \img([NoteTable1]Sheet1)).
- Enter data into the table that is created. Note that it is a standard Origin worksheet and as such, is customizable in any way that the standard worksheet is customizable.
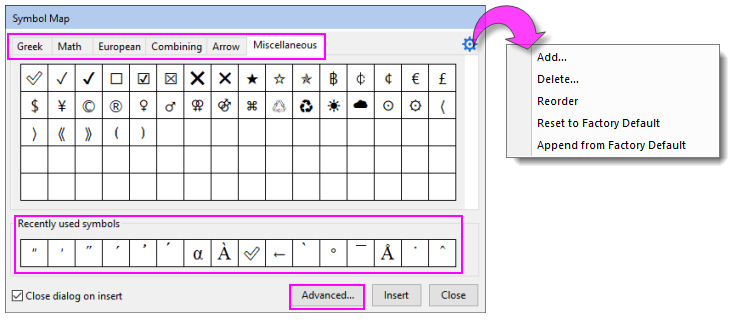
Symbol Map
Opens a simplified Symbol Map with characters sorted by tab.
- Insert symbols from the Greek, Math. European, Combining, Arrow and Miscellaneous tabs.
- Click Advanced to go to the Advanced Symbol Map.
- Symbols inserted from any tab -- or inserted from the Advanced Symbol Map -- will be added to the Recently used symbols list at the bottom of the dialog.
- Click on the "gear" icon to modify the list for the current tab.
For more on the use of the Symbol Map, see Symbol Map and Character Map.
LaTeX Equation
- Right click and select Insert: LaTeX Equation to open the LaTeX Equation Editor.
- You can click the Equation button
 to open a list of Origin's fitting functions (incl. your user-defined functions). Pick a function or enter an equation into the top box and preview it rendered in the bottom panel. See also this document. to open a list of Origin's fitting functions (incl. your user-defined functions). Pick a function or enter an equation into the top box and preview it rendered in the bottom panel. See also this document.
For more examples, please choose menu Notes: Load Samples: LaTeX Equations.txt.
Note: Before Origin 2023b, Insert: LaTeX Equation context menu will open the LaTeX Equation Editor App (if you've not already installed this free App, you are prompted to do so).
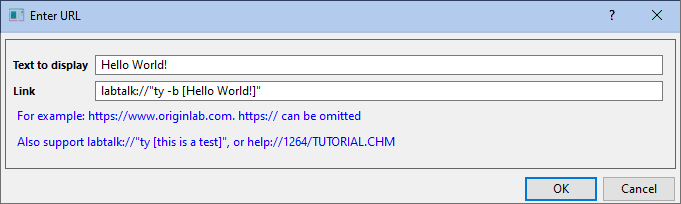
Link
Opens a dialog box for entering Text to display and a Link. Several types of links can be entered, for instance:
- Links to webpages (e.g. https://www.originlab.com)
- Links to help file pages (e.g. help://1293/TUTORIAL.CHM)
- Links to worksheet cells (e.g. range://[book1]sheet1!col(1)[100]
Additionally, you can run simple LabTalk commands from the Link box (e.g. labtalk://"ty -b[Hello World!]")
Example Syntax as seen in raw text mode, Notes window:
\link(labtalk://"ty -b [Hello World!]", Hello World!)
In Render Mode, clicking on the text in the Notes window will bring up an attention box that says "Hello World".
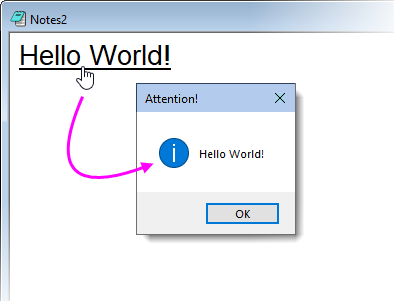
Image from File
Opens a dialog to browse for image files.
- The inserted image is linked to an external file and is not saved with the project. This helps to control project file size but be aware that sharing the project with others will require you to share external images, as well.
- The width of the image is modified using a "w" parameter (e.g. w=1000), where units are logical pixels).
Example Syntax as seen in raw text mode, Notes window:
\img(file://"%@JSamples\Image Processing and Analysis\car.bmp", w=1000)
| The %@J string register in the above example returns the path of the Origin EXE folder.
|
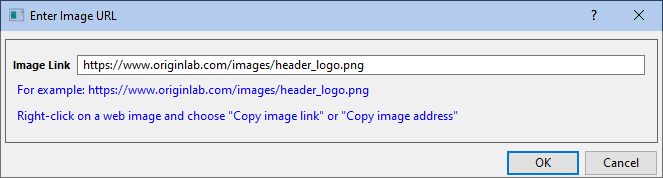
Image from Web
Opens a dialog to specify a Image Link for a web image (hint: In your browser, right-click on an image and Copy Image Address, Copy Image Link, etc).
- The width of the image is modified using a "w" parameter (e.g. w=1000), where units are logical pixels).
Example Syntax as seen in raw text mode, Notes window:
\img(https://www.originlab.com/images/header_logo.png, w=200)
Paragraph Style
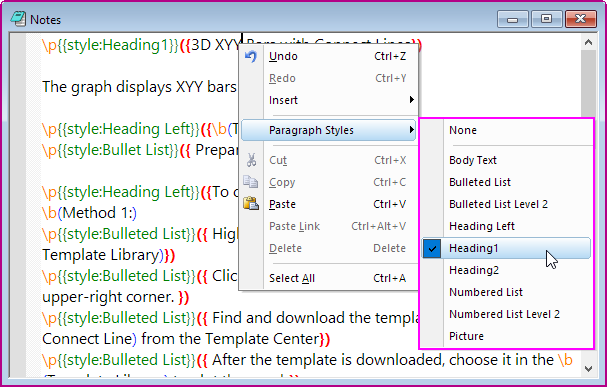
Apply Style to Paragraph
In Origin, you can use the build-in text style to apply to the paragraph.
When the cursor is in the paragraph, right-click to open the menu, you can select the Paragraph Style in the list.
Modify Text Style
You also can define new style by Modify Text Style tool.
- Select menu Tool: Text Style Manager to open the dialog. You can modify the build-in style, or add a new style.
- After creating a new style by this tool, the new style will be listed under Paragraph Style context menu.
- A TextStyles.ini file is created and saved to User Files folder. You can share your customized text style to other Origin user by sharing this file.

| Style to Modify
|
Select a style in the list to modify it.
If select <new>..., New Style Name dialog is pop-up. And you can define the name for a new style.
|
| Font Face
|
Select the paragraph font type from this drop-down list.
|
| Size Factor(%)
|
Type or select the desired text size (in points) .
|
| Color
|
Select the desired text color from this drop-down list. Create custom colors by selecting the Define Custom Colors button and specifying the RGB in the Color dialog that opens.
|
| Justification
|
Check this checkbox, then you can select Left, Center or Right as the paragraph alignment.
|
| Font Style
|
- Bold: Select this check box to change the text style to bold.
- Italic: Select this check box to change the text style to Italic.
- Underline: Select this check box to set the text style with underline.
|
| Spacing
|
- Extra Line Spacing (%): Type or select the desired spacing for the text line.
- Before Paragraph (pts): Type or select the desired spacing (in points, where 1 point=1/72 inch) before Paragraph from this combination box.
- After Paragraph (pts):Type or select the desired spacing (in points, where 1 point=1/72 inch) after Paragraph from this combination box.
|
| Indentation (% of font size)
|
- Left: Type or select the percentage of font size for left indentation of paragraph .
- Right: Type or select the percentage of font size for right indentation of paragraph .
|
| List
|
Set this text style with bulleted or number list.
|
Modify Text Style with Escape notation
- \p{{syntax1:value; syntax2:value; syntax3:value}}({paragraph content})
| Syntax
|
Description
|
Sample
|
| color or c
|
Specify the paragraph text color by color index.
Please refer to the color index from the build-in color list. If not specify color, the text is black by default.
|
color:6
|
| p
|
Specify the percentage of text size (in points) .
|
p:175
|
| f
|
Specify the paragraph text font type by font name
|
f:Times New Roman
|
| lineSpacing
|
Specify the percentage of spacing for the text line.
|
lineSpacing:100
|
| beforeSpacing
|
Specify the percentage of spacing before paragraph
|
beforeSpacing:150
|
| afterSpacing
|
Specify the percentage of spacing after paragraph
|
afterSpacing:200
|
| leftindent
|
Specify the percentage of font size for left indentation of paragraph.
|
leftindent:100
|
| rightindent
|
Specify the percentage of font size for right indentation of paragraph.
|
rightindent:400
|
| align
|
Set paragraph alignment to Left, Center or Right.
|
align:right
|
| italic
|
Set the paragraph text to italic
|
italic
|
Set Paragraph as List
Besides using build-in Paragraph Style to set the list (bullet list/ number list) for the paragraph, we can use notation to set the paragraph list and custom more list properties.
| Property
|
Description
|
Used in Bullet List or Number List
|
Value
|
| list
|
Specify list name to indicate list type and levels.
|
--
|
- bullet / bullet1 /bullet2
- number/ number1 / number2
|
| listbullet
|
Specify the style of the bullet
|
Bullet
|
If not specify bullet style, the bullet is black dots by default.
- white bullet
- diamond
- triangle
|
| listnumber
|
Specify the style of the number
|
Number
|
- %d: Use numeric 1, 2, 3 etc. as the number list format
- %c: Use letter a, b, c etc. as the number list format
|
| liststart
|
Specify the start number index of the number list
|
Number
|
numeric
|
Simple Paragraph List
Use these notation for the paragraph list, and custom the text color, bullet style and list numeric text format.
- \p{{list:list name}}({paragraph content})
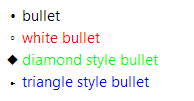
\p{{list:bullet;color:4}}({bullet})
\p{{list:bullet;color:5;listbullet:white bullet}}({white bullet})
\p{{list:bullet;color:6;listbullet:diamond}}({diamond style bullet})
\p{{list:bullet;color:8;listbullet:triangle}}({triangle style bullet})
|
|
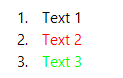
\p{{list:number;color:1}}({Text 1})
\p{{list:number;color:2}}({Text 2})
\p{{list:number;color:3}}({Text 3})
|
|
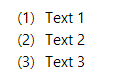
- Using listnumber property can custom list numeric text format
\p{{list:number;listnumber:(%d)}}({Text 1})
\p{{list:number;listnumber:(%d)}}({Text 2})
\p{{list:number;listnumber:(%d)}}({Text 3})
|
|
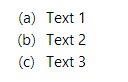
\p{{list:number;listnumber:(%c)}}({Text 1})
\p{{list:number;listnumber:(%c)}}({Text 2})
\p{{list:number;listnumber:(%c)}}({Text 3})
|
|
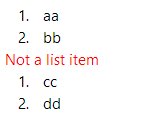
| Note: If insert non-list items (blank line, paragraph, Graph, Image) between the two paragraph list, it will break the number index.
\p{{list:number}}({aa})
\p{{list:number}}({bb})
\p{{color:2}}({Not a list item})
\p{{list:number}}({cc})
\p{{list:number}}({dd})
|
|
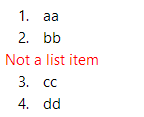
To avoid breaking the number index, use liststart property for the second half list.
\p{{list:number}}({aa})
\p{{list:number}}({bb})
\p{{color:2}}({Not a list item})
\p{{list:number; liststart:3}}({cc})
\p{{list:number}}({dd})
|
|
|
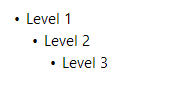
Multiple Levels List
There are 6 values of the list property, including: bullet, bullet1, bullet2, number, number1 and number2
- They allow nesting up to the depth three for each of bullet and number, for total of six. Each of them is a list name to indicate nesting. The name alone does not indicate the depth, but the position in the sequence is what matters.
\p{{list:number1}}({Level 1})
\p{{list:number2}}({Level 2})
\p{{list:number }}({Level 3})
|

|
\p{{list:bullet2}}({Level 1})
\p{{list:bullet }}({Level 2})
\p{{list:bullet1}}({Level 3})
|
|
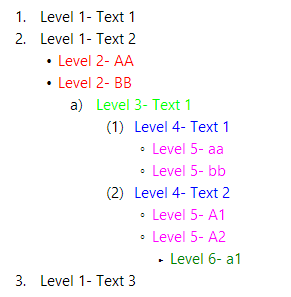
- You can set six levels for a list
\p{{list:number}}({Level 1- Text 1})
\p{{list:number}}({Level 1- Text 2})
\p{{list:bullet;color:2}}({Level 2- AA})
\p{{list:bullet;color:2}}({Level 2- BB})
\p{{list:number2;color:3}}({Level 3- Text 1})
\p{{list:number1;color:4; listnumber:(%d)}}({Level 4- Text 1})
\p{{list:bullet1;color:6; listbullet:white bullet}}({Level 5- aa})
\p{{list:bullet1;color:6; listbullet:white bullet}}({Level 5- bb})
\p{{list:number1;color:4; listnumber:(%d)}}({Level 4- Text 2})
\p{{list:bullet1;color:6; listbullet:white bullet}}({Level 5- A1})
\p{{list:bullet1;color:6; listbullet:white bullet}}({Level 5- A2})
\p{{list:bullet2;color:12; listbullet:triangle}}({Level 6- a1})
\p{{list:number}}({Level 1- Text 3})
|
|
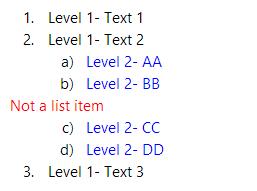
- In multiple levels list, Origin only supports some non-list items inserted in level one and level two.
For the level one sample, you can refer to the Tip in above section. Here, shows about inserting non-list item in the level two. You also can use liststart property to define the desired index for the restarting list.
- \p{{list:level 1 list name|level 2 list name; liststart:the number of level 1|the number of level 2}} ({paragraph content})
\p{{list:number}}({Level 1- Text 1})
\p{{list:number}}({Level 1- Text 2})
\p{{list:number1;color:4}}({Level 2- AA})
\p{{list:number1;color:4}}({Level 2- BB})
\p{{color:2}}({Not a list item})
\p{{list:number|number1;color:4;liststart:2|3}}({Level 2- CC})
\p{{list:number1;color:4}}({Level 2- DD})
\p{{list:number}}({Level 1- Text 3})
|
|
Print or Export to PDF
You can output Notes window content to a physical printer; or print to PDF using a third-party driver such as Microsoft Print to PDF.
To create nice-looking output, you'll need to pay attention to these settings:
- Paper Size: This is set in File: Page Setup or in the Advanced options for your printer driver.
- Margins: These are set in File: Page Setup.
- Notes Display Margin: By default, the Notes display margin = 5 (units = points). Thus, you will note that in Render Mode (CTRL + M), there is a slight margin to the left side of the Notes page. This display margin is controlled by setting system variable @NDM.
- Notes Window Page Width: Page width is controlled by the property
note.width (units = in/cm, etc). Default = 0, which corresponds to an uncontrolled width.
- When width is uncontrolled (
note.width = 0 ), Notes Window Page Width is approximately equal to Paper Size – Margins. This should produce a satisfactory printout to PDF or paper.
- If you do specify
note.width, do not exceed Paper Size – Margins or your text may be cut off.
|