8.6.1.5 Escape SequencesEscape-Sequences
Escape sequences and text formats
When applying special formatting to text objects on graphs, worksheets or layout pages, typically you would select the target text with your mouse and click a button on the Format or Style toolbars. When working with text objects using WYSIWYG methods, you typically are not aware of the hidden text formatting commands behind the toolbar buttons -- what we call escape sequences. However, there are places in the Origin interface where these escape sequences are seen and there are times when it is helpful to have a basic understanding of what they are and how they work.
All text labels (those created with the Text tool, the Add Text shortcut menu command, the LabTalk Label command, or any prefixes or suffixes that you type in text boxes) as well as text plotted from a Label column will use these escape sequences, even though, as mentioned, they may not be seen. All escape sequences begin with a backslash "\" character, and are followed by a control character that determines how the affected text is modified. Finally, the text to be modified follows the control character, and is enclosed in parentheses, like this:
\ControlCharacter(TheTextToBeModified)

When you use the buttons and drop-down lists on the Style and Format toolbars to format text labels, Origin automatically adds these formatting commands to the affected text. These formatting commands, while not visible in the text label itself, can be observed in the text label's Object Properties dialog box (Format: Object Properties).
For example, we could use the Text tool to create a text label that reads "Control," then highlight the text and click the Bold button (Format toolbar). The label as it appears on your graph or worksheet simply reads "Control" but what you see if you open the label's Object Properties dialog box is that your text is now enclosed by a "\b( )" sequence. It is the "\b( )" formatting command that causes the word "Control" to display in bold type. The practical significance of this is that you can explicitly use these special formatting commands to format your text -- in prefix or suffix text boxes, in the Object Properties dialog box, or with the LabTalk Label command when programmatically creating text labels -- in situations where the WYSIWYG text editing methods are not available to you.
Note that some supported escape sequences are interpreted by LabTalk while others are standard C-language escape sequences.
Available text formatting commands
| Syntax
|
Description
|
Entering...
|
Results in...
|
|
\(ASCII character code)
|
Displays the specified ASCII symbol.
|
\(169)
|

|
|
\-(text)
|
Format text as subscript.
|
sub\-(script)
|

|
|
\+(text)
|
Format text as superscript.
|
super\+(script)
|

|
|
\=(text1,text2)
|
Supersubscript notation. Format text1 as subscript, text2 as superscript.
|
script\=(sub,super)
|

|
|
\=(text1\v(,)text2,text3)
|
Supersubscript notation. Format text1 and text2as subscript (there are a comma between them), text3 as superscript.
|
script\=(sub1\v(,)sub2,super)
|

|
|
\ab(text)
|
Display a bar above text.
|
\ab(X)
|

|
|
\ad(text)
|
Display a short line - a dot - above text.
|
\ad(A)
|

|
|
\at(text)
|
Display a tilde above text.
|
\at(A)
|

|
|
\b(text)
|
Format text as bold.
|
\b(bold)
|

|
|
\cnumber(text)
|
Displays text in the color located at position number in the Color drop-down lists.
|
\c2(red)
|

|
|
\f:fontname(text)
|
Displays text using the fontname font. You can abbreviate fontname, as long as you use enough letters for the name to be unique.
|
\f:Wide Latin(font)
|

|
|
\g(text)
|
Format text in Greek symbols.
|
\g(Greek)
|

|
|
\h(text)
|
Block substitution notation
|
\h(\l(1) %(?Y))
|
\l(1) %(?Y)
|
|
\i(text)
|
Format text as italics.
|
\i(italics)
|

|
|
\p%pointsize(text)
|
Change the point size of text. 200 doubles the size, 100 results in no change, etc.
|
change\p200(point)size
|

|
|
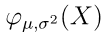
\(text\)
or
\[text\]
or
\q(text)
|
Render the text (LaTeX markup) as a LaTeX object when inserting LaTeX Equation (for Origin 2023 or ealier version, need to use the 2017 LaTeX App).
From 2025, to display LaTex format, it does not need to put the text inside \q( ).
|
\(\varphi_{\mu, \sigma^{2}}(X)\)
or
\[\varphi_{\mu, \sigma^{2}}(X)\]
or
\q(\varphi_{\mu, \sigma^{2}}(X))
|
|
|
\s(literal text)
|
Strike the text.
|
\s(abc)
|

|
|
\sc(text)
|
Insert one conditional horizontal space in a string even there are multiple consecutive spaces. This is used when some labels not exist and there will be some(>1) spaces. \sc make one space only.
|
\b(%(1Y,@LL)\sc%(1Y,@LD3)\sc%(1Y,@LD4)\sc(%(1Y,@LU)))
|
LName Unit
|
|
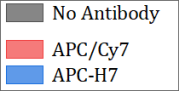
\sep:nn
|
In multi-line text labels (including graph legends), add extra separation between previous line and next line in the amount of nn, where nn is percent of font height.
|
\l(1) %(1)
\sep:50
\l(2) %(2)
\l(3) %(3)
|
|
|
\u(text)
|
Format text as underline.
|
\u(underline)
|

|
|
\v(text)
|
Treat text as literal text.
This is useful when displaying a path that includes a backslash '\' .
|
\v
(C:\Samples\Programming)
|

|
|
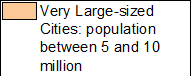
\ww(literal text)
|
Wrap literal text entered in the legend object's Properties dialog and left-align it within the "box" allocated for the text portion of the legend.
|
\ww(Very Large-sized Cities: population between 5 and 10 million)
|
|
|
\x(unicode number)
|
Display the unicode character.
|
\x(03b8)
|

|
|
\y(')
\y(")
|
Displays a full height prime or a full height double prime. To display it as a combining prime/double prime, use superscript like \+(\y(')) or \+(\y(")).
|
\g(c)\=(3,\y('))
|

|
A note on entering the backslash "\" character in text labels
When you are creating/editing a text label using the standard WYSIWYG methods, you can directly enter the backslash character into the label. It will not be interpreted as an escape sequence.
So, for instance, to type...
- This file is located at C:\MY FILES
...you simply type the text, just as it reads, into the text label.
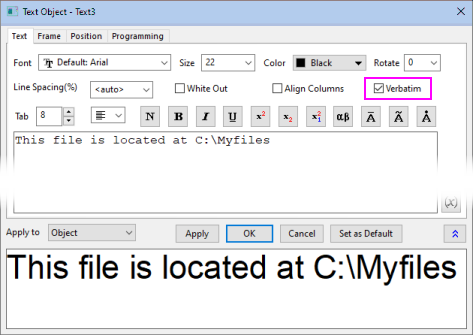
Note that Origin handles WYSIWYG insertion of the backslash by automatically inserting a second backslash character into your text string in a "behind the scenes" fashion. When in WYSIWYG mode, you see only a single backslash character. However, opening the object's Properties dialog box, will show that a second backslash character (see the picture below) has been added (Do not remove the second backslash character in this dialog box as this will break the text label, as explained below).
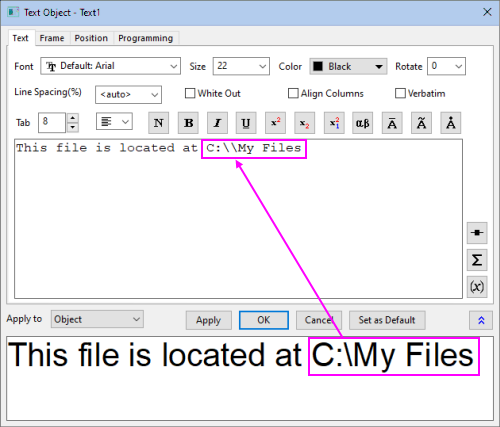
Use of the backslash "\" character in the Object Properties dialog box
A backslash character ("\") entered directly into the Object Properties dialog box is interpreted as an escape sequence.
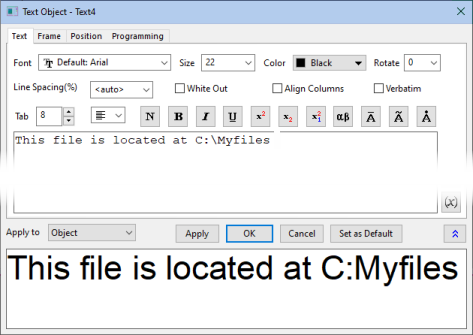
For example, if you type the following in the Object Properties dialog box:
- This file is located at C:\MY FILES
Origin displays:
- This file is located at C:MY FILES
Note that the backslash doesn't display. If an unsupported option or no parenthesis follows the backslash character, then the backslash character is ignored and does not display. Therefore, if entering or editing text directly in the Object Properties dialog box, you must do one of the following to display the backslash character:
- Enter a double backslash \\ into the string (example: "This file is located at C:\\MY FILES").
- Use the \v( ) escape sequence (example: "This file is located at \v(C:\MY FILES)").
- Place a check mark in the Verbatim box of object Properties, Text tab.
Using LabTalk...
- Enter text in the Object Properties dialog box literally (entering only a single "\" character (see the picture below) -- not the double "\\"), then click OK.
- Open the Command Window and enter the following at the command line:
- ObjectName.verbatim=1 <ENTER>
- Where ObjectName is the text object Name (as it appears in the Programming tab of Properties).
The backslash character now displays properly in your text label.
|
Note: The ObjectName.verbatim method is also useful when performing similar actions (inserting file path information via string variables) using the WYSIWYG text editing methods. While the WYSIWYG methods support direct entry of the backslash "\" character, backslashes are not properly handled when they are part of a string (as, for instance, a file path).
For an example of how this is handled in a text object created using WYSIWYG methods, see Substituting Variable Values in Text Labels.
|
A note concerning escape sequences and graph Themes
Graph Themes allow you to copy the properties of one text object and paste them to another text object. However, there are some properties of text objects which cannot be copied and pasted. If the text object property is created by inserting an escape sequence into the text object, it cannot not be applied to another text object.
To understand which text formatting options cannot be pasted to other text objects, you can begin by creating a text object and selecting it with a single mouse click. Here, you see that some Format and Style toolbar buttons -- Bold, Italic, Underline, etc. -- are not available (the buttons are grayed out), whereas others -- Greek, Increase Font/Decrease Font, Font Color, etc. -- are available.
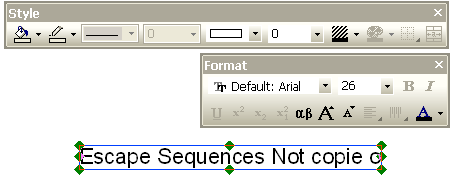
Those buttons and drop-down lists that are not available when the text object is selected, require an escape sequence to create the format option and it is these format options which are not carried over when copying a format and pasting it to another text object.
|