8.13.2.2 Layer Management-Quick StartLayer-Management-Quick-Start
The Layer Management dialog manages the layer(s) in the active graph by adding, editing, arranging and linking layers.
To open this dialog:
- Activate the graph and choose menu Graph: Layer Management
- Right click on the layer icon and select Layer Management in the context menu.
- Right click on the layer level on Object Manager tool, and select Layer Management in the context menu.
 | The Apply button applies settings to the preview but not the real graph. Any operations which have been applied to the preview graph can be undo with the Undo button in dialog.
All the operation will be applied to the active graph only when user click the OK button.
|
| Note: Since Origin 2018b, we have introduced the common display function for multiple-layer graphs, which can be used to apply the customizations made to one graph layer to other graph layers in the same multi-layer graph page.
Based on this, you might need check the common display settings when you selected multiple layers and want to use the Layer Management tool to customize them together.
|
Apply Settings to Multiple Layers Simultaneously
With the Layer Management dialog, settings can be applied to multiple layers simultaneously. Please see a quick example as below:
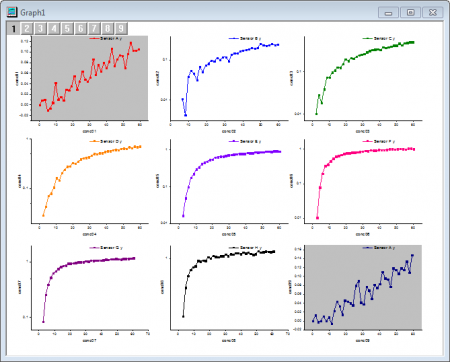
- Import Step01.dat and Step02.dat under \Samples\Curve Fitting\ folder by clicking Import Wizard. Select Import Mode as Start New Columns.
- highlight dataset from conc01~conc09 in workbook and click menu Plot: Multi-panel: 9 Panel to plot.
- Select Format: Page to open the Plot Details dialog. Go to Layers tab, and uncheck Layer Properties, Axis Style and Plot Properties check box. Click OK button to close the dialog.
- Select the plots one by one and use the Line/Border Color button
 in the Style toolbar to set the plot color for each plot in each layer. in the Style toolbar to set the plot color for each plot in each layer.
- Activate the graph and select Graph: Layer Management menu the to launch the Layer Management dialog. Go to the Display tab, select Layer1 and Layer9 in the Layer Selection panel on the left.
- In the middle panel, customize as follow:
- Option: Color
- Background Color: LT Gray
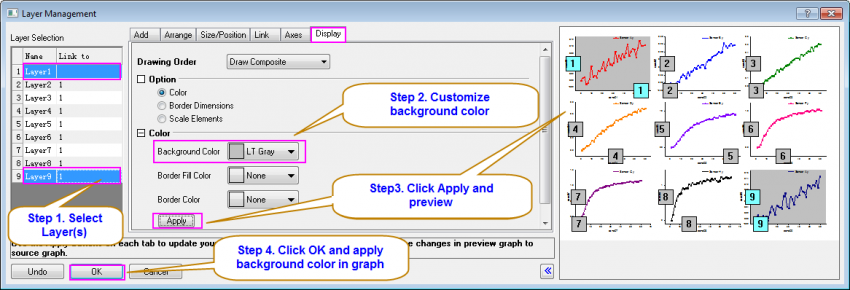
- Click Apply to preview the effect, the background of selected layers change into gray.
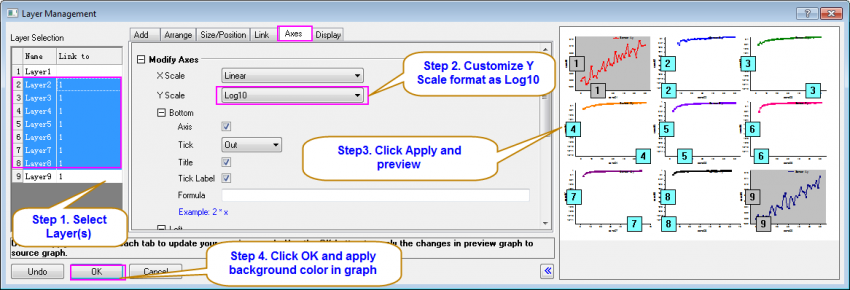
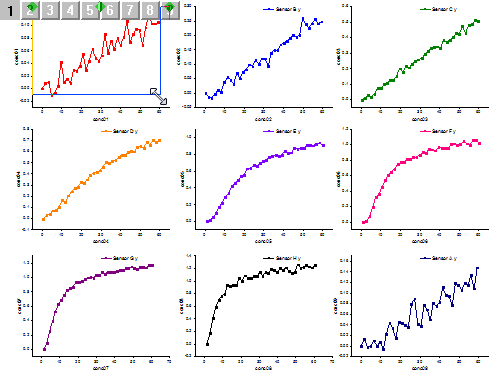
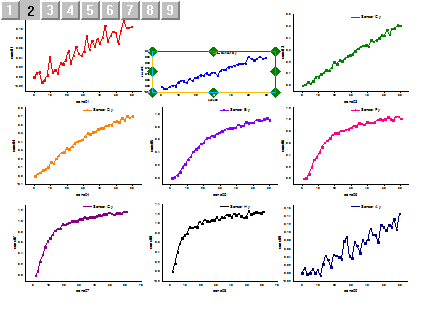
- Go to the Axes tab, and select Layer2, press SHIFT and select Layer8. Now all these seven layers (Layer2, 3, 4, 5, 6, 7, 8) has been highlighted.
- In the middle panel, Modify Y scale as Log10. Click Apply to preview. Click OK to apply the setting to graph and close the dialog.
- Rescale these layers one by one.
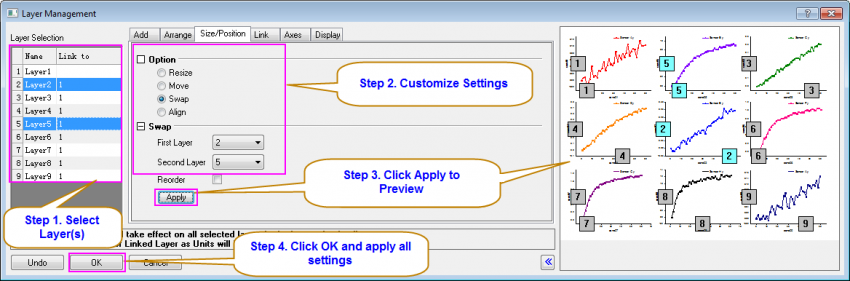
Apply Settings Between Layers: Swap, Align and Link
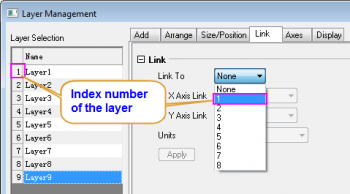
To perform the swap, align and link operation between layers, user should specify the index number of the layers.
| Operation
|
Dialog Option
|
| Swap
|
Size/Position tab: Swap
|
| Align
|
Size/Position tab: Align
|
| Link
|
Link tab
|
Swapping Layers
Follow the steps below to learn how to swap the layers.
- Activate the graph and select Graph: Layer Management.
- Go to Size/Position tab and select Layer4 and Layer9 in Layer Selection panel. Customize Option as Swap, First Layer as 4 and Second Layer as 9. Click Apply to preview.
- Click OK to apply settings.

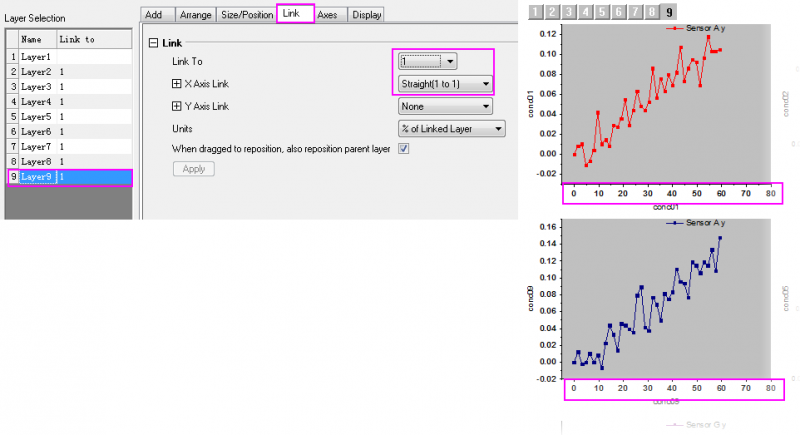
Linking Layers
- Back to Layer Management dialog and go to Link tab to select Layer9 set X Axis Link as Straight(1 to 1). Click Apply.
- Click OK to apply swapping and linking settings onto the graph.
- Go to axis dialog to set the scale of Layer 1 as from -5 to 80. The X axis of Layer9 will be automatically updated according to scale of Layer1.
| If the layers are linked, they are treated as one unit. If you need to rearrange(re-size or re-postiion) layers, you should first unlink them. You can re-link layers after arranging.
|
| When select the parent layer to be link to, Only layers with smaller index number can be selected as parent layer. If you want to set latest layers(s) as parent layer, please reorder them in the Layer Selection Panel first
|
Arrange Layers
The Layer Management tool can be used to manage the layers in the active graph by adding, deleting, editing, re-sizing and re-position layers.
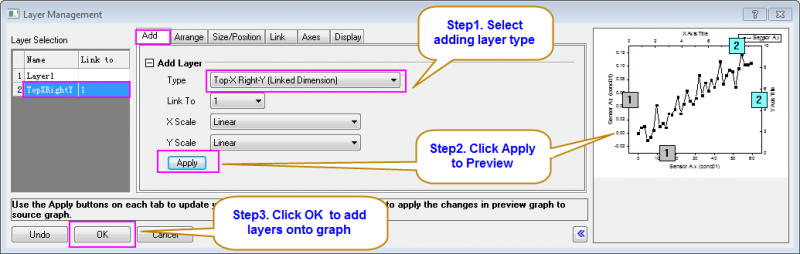
Adding Layers
In the Layer Management dialog, you can add layers of different types with the Add tab.
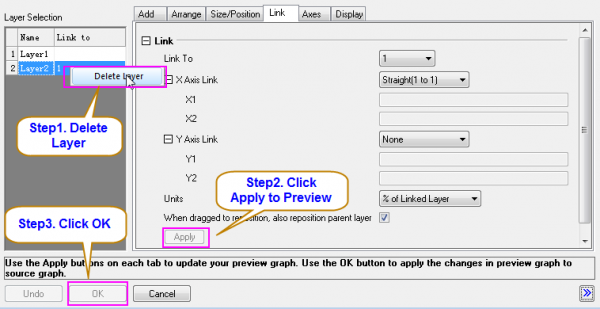
Deleting Layers
To delete specific layer, right click the layer and select Delete Layer. Click Apply to preview then click OK to implement it.
Reordering Layers
With Layer Management dialog, you can reorder layer index number in layer selection panel. To give a clear explanation, we start with a double-Y graph. In the following left graph, green symbol line plot with Right Y axis is in Layer 1, Orange column plot with Left Y axis in Layer 2. To bring the symbol line plot on top of the column, you can reorder these two layers.
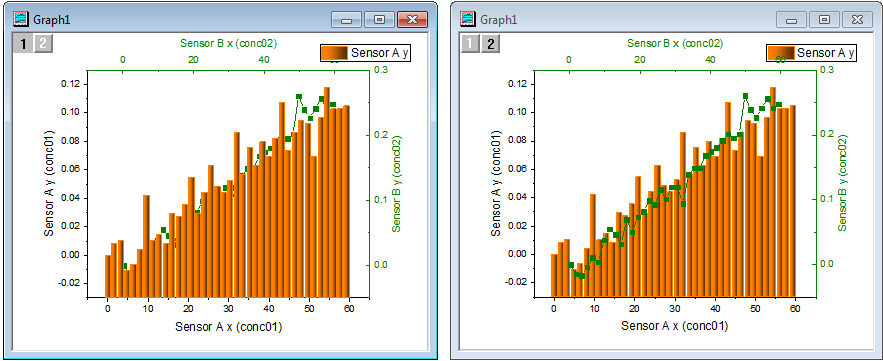
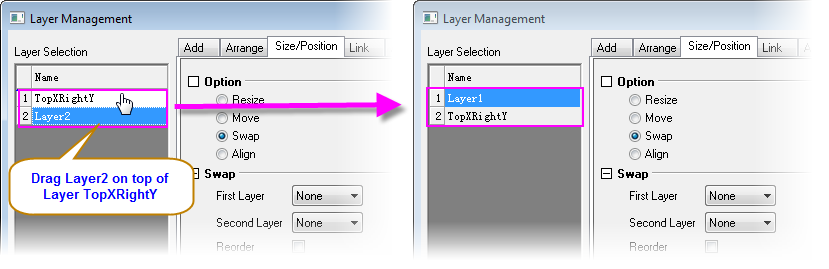
Open the Layer Management dialog and drag the Layer2 on top of LayerTopXRightY on Layer Selection Panel. The Layer2 then is ahead of LayerTopXRightY, renamed as Layer1 simultaneously. Click Apply then OK to implement.
Note: Origin may break layer links during the reordering process. To learn more about the layer management tool, please refer to the Laymanage X-Function.
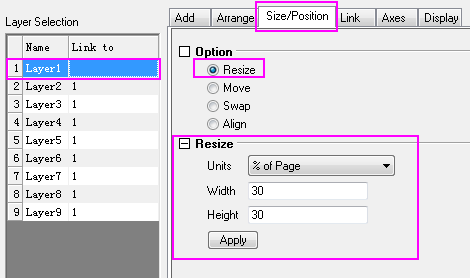
Resizing Layers
While the layers are linking, re-size the parent layer also re-size all child layer(s) in the same time.
you must first link those child layers onto a parent layer in Link tab. After Linking, go to Size/Position tab,select the parent layer in Layer selection panel, then select Resize and customize the size. Click Apply then OK and all child layers will be resized according the parent layer's size
You can also directly resize the parent layer on the multi-layer graph.
To resize one of the child layers, you should first quarantine a separate layer from the linking group. To do this, return to the Layer Management dialog select the specific child layer in the Layer Selection Panel then uncheck the checkbox When dragged to reposition, also reposition parent layer in Link tab. Click Apply then OK.
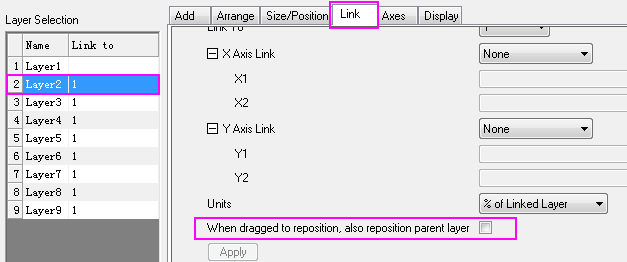
Then you can resize the separate child layer. The method is similar to what has been mentioned above for resizing tje parent layer. You can resize the separate layer in the size/position tab by selecting certain child layer in layer selection panel, or use the eight-square rectangle to resize it directly on the graph.
Note: When the checkbox When dragged to reposition, also reposition parent layer in Link tab is selected for a child layer, resizing this child layer will make the whole linked layers group to resize.
Repositioning Layers
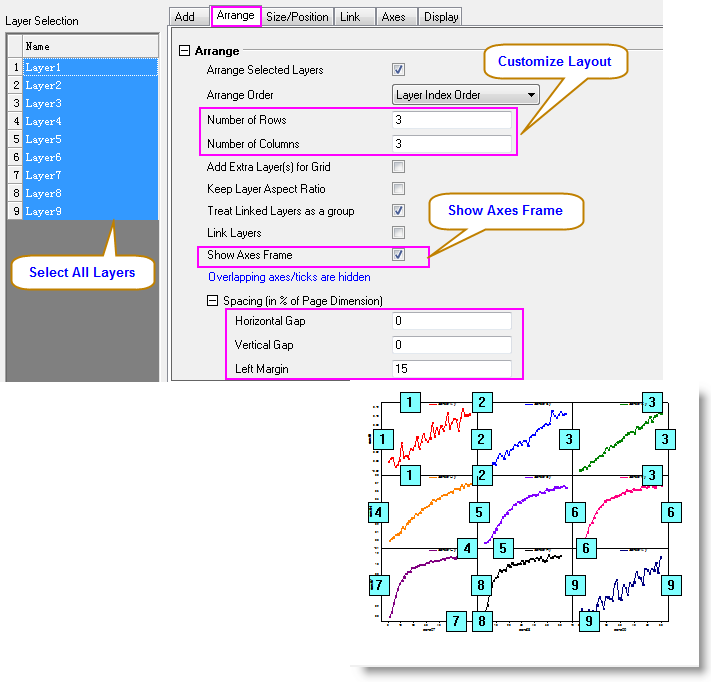
There is some situation you want to readjust layers position and layout in a multi-layer graph. You can go to Arrange tab and customize the gap and layout settings. In the following, the multi-layer graph was set as a 3 multiply 3 layout with zero gap. Click Apply to visualize it in preview window, then OK to implement.
| You should break all the links between parent layers and child layers before customizing the layout, including spacing setting or the number of columns/rows
|
FAQs
See Also
|