6.9.1 Building and Saving a QueryImpDatabase-BuildSave-Query
Connecting to a Datasource
To import SQL data, start with the Data: Connect to Database menu command:
- To open a saved connection (ODS) or query (ODQ) file, click Open. If your connection is valid, this opens the SQL Editor dialog box.
- If you have not previously connected to your datasource, you will need to set up a connection.
- Click New to open the Database Connector dialog.
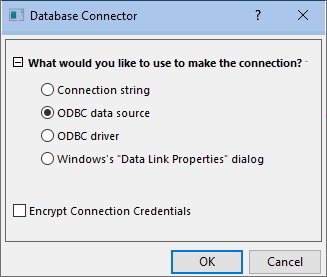
- Connection string: Select this if you already have a text-based connection string for a given data source (ODBC or OLE DB).
- ODBC data source: Select this if you have defined an ODBC data source via the Windows ODBC Data Source Administrator applet.
- ODBC driver: Select this if you have an ODBC driver and want to create a data source applicable to this data connector instance.
- Windows Data Link Properties dialog: Select this if you are using an OLE DB-based data source such as some SQL Server or Access client libraries.
Connection String
Connection Strings are a useful method for quickly establishing a new connection from an existing connection.
- If you already have a valid connection string to an ODBC or OLE DB datasource, choose this option and enter your connection string.
- If the authentication/login info in a connection string is encrypted, you will be asked to re-enter this information. If your connection string is valid, this opens the SQL Editor dialog box.
ODBC data source
To establish a new connection to an ODBC data source, choose this option:
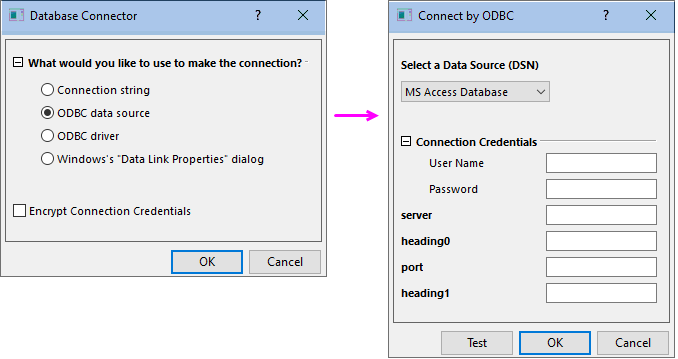
- In the Database Connector dialog box, choose ODBC data source and click OK.
- Select a Data Source (DSN) and enter connection parameters in the Connect by ODBC dialog box.
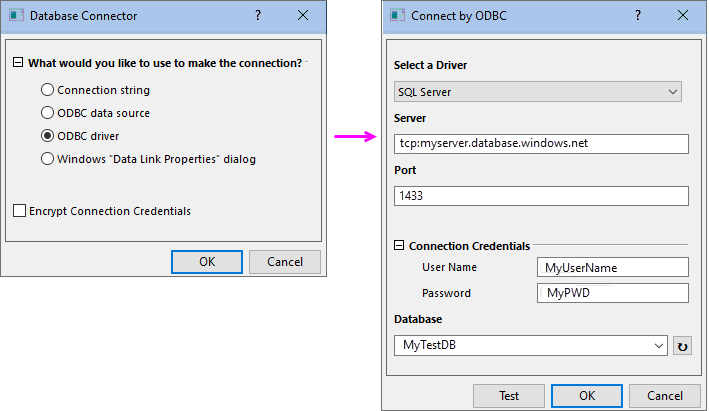
ODBC driver
Select this if you have an ODBC driver and want to create a data source applicable to this data connector instance.
Windows "Data Link Properties" dialog
OLE DB
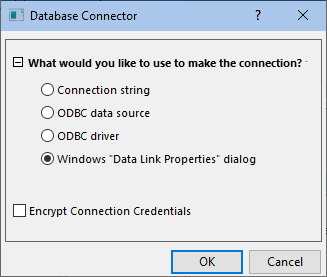
- In the Database Connector dialog box, choose Windows "Data Link Properties" dialog".
- On the Provider tab, select an OLE DB Provider, then click Next to go to Connection tab.
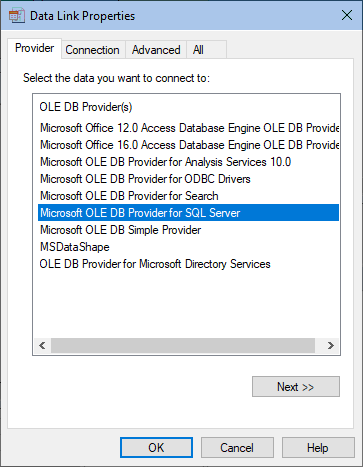
- Select or enter a server name (If the server is not listed, simply type its name).
- Enter User name and Password.
- Click OK (other tab controls are optional) to connect to your data source.
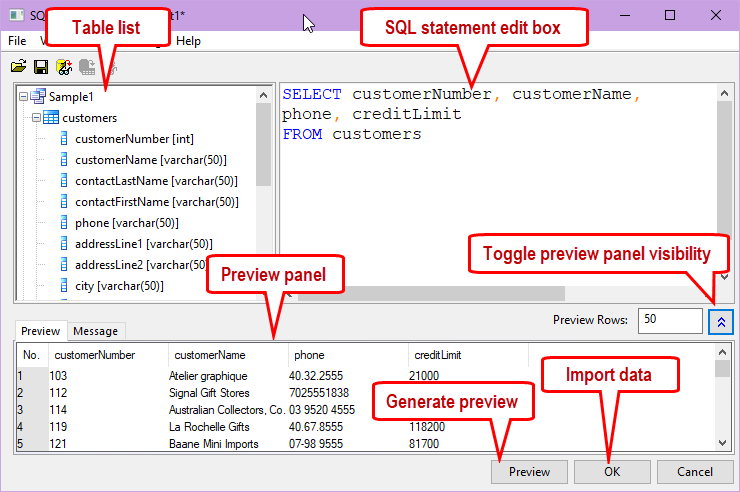
Building a query
Once you have established a connection to your data source, you will see a list of objects on the left panel (Table List) of the SQL Editor dialog.
Double-clicking on a table node will add the table node to the SQL statement edit box on right panel. Or you can directly paste the SQL query into the SQL statement edit box.
For a working example of building a query, see this OriginLab blog post on Connecting to a Database and Importing Data.
Saving a query
You can save a query to a workbook or an ODQ file by going to the SQL Editor menu and selecting either File: Save to Active Worksheet or File : Save Connection and Query as.... In addition, clicking the Import button in the SQL Editor dialog box will automatically save the query in the target worksheet.
Saving a query to workbook (File: Save Window As) allows you to preview the data on the workbook and import the data at any time you want. The workbook can be saved as a template (File: Save Template As), which can also store information on the formatting of the workbook. Next time you open the template, you will have a formatted workbook with a customized query saved in it. By clicking the Database Connector icon  in the upper left corner of the template, you can Import and fill the formatted workbook with data acquired from the data source. To view or modify a query saved in active worksheet, click the Database Connector icon and choose SQL Editor. in the upper left corner of the template, you can Import and fill the formatted workbook with data acquired from the data source. To view or modify a query saved in active worksheet, click the Database Connector icon and choose SQL Editor.
Saved query (ODQ) files can be loaded by clicking Data: Connect to Database: Open and browsing for the file or by clicking one of the saved files in the recently-used list. After an *.ODQ file is loaded, you can preview or import it to the active workbook. This is useful when you want to apply the query to multiple workbooks.
Automatically refresh database
By clicking the Database Connector icon in the upper left corner of the worksheet and select Auto Refresh..., you can refresh the database by a specified time interval and temporarily stop refreshing.
Refer to this page for details.

|