4.7.1 Inserting Links into Worksheet CellsInsLink-to-WksCell
These things apply to all cell links:
Editing of a link:
- Press and hold down the mouse button for more than 1 sec. and then release the mouse.
- Alternately, hold the ALT key and double-click on the linked text.
- Alternately, select Edit: Edit Mode to edit the linked cell.
- You can format and align text in hyperlinked cells. This is supported in both the label row and data row areas of the worksheet.
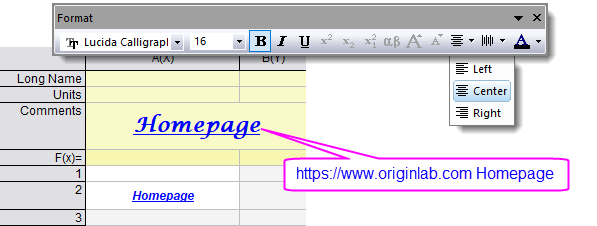
 | Use of substitution notation in a link:
Most links support an optional DisplayedText that is distinct from the actual link portion of the string. Substitution notation is supported in the DisplayedText part of a link. For instance, if you declare a string variable str$=Homepage, then http://www.originlab.com %(str$) will display the hyperlinked text Homepage in the cell.
View linked cells with background color
To distinguish linked cells at first glance, including cells linking to other cells in the project, various kinds of LabTalk links beginning with "var://" and "str://", select View: Highlight Formula/Linked Cells so that the linked cells will be highlighted with a different background color.
|
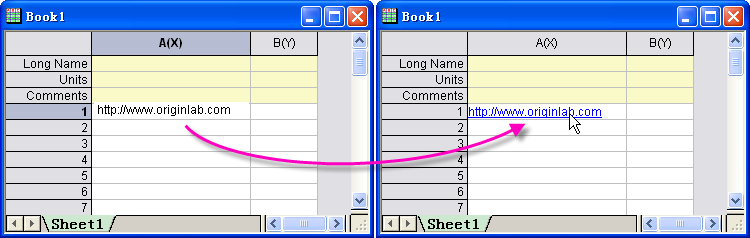
Inserting URL Links
To insert live links into worksheet cells, begin URLs with http:// or https://. The link will become active when you finish editing, and will open in a web browser when clicked.
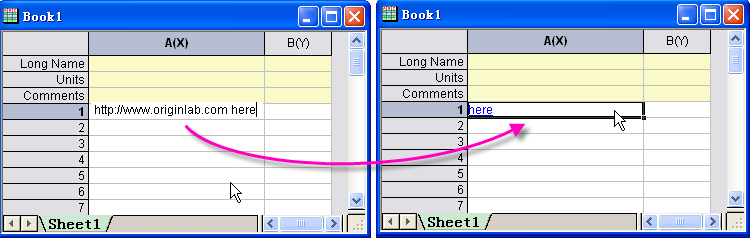
To insert a link with display text different from the URL, use the following syntax, being careful to insert white space between the URL and the displayed text:
URL DisplayedText
For example, if you enter http://www.originlab.com here, the word “here” appears in the cell. When clicked, a web browser opens to the OriginLab website.
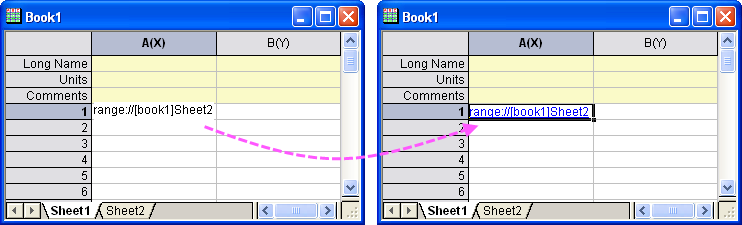
Inserting Range Links
To insert internal links to ranges, begin with range://, and then follow with book, sheet, and column information, using the syntax in these examples:
- range://[book1]sheet2
- This will activate Sheet2 in Book1.
- range://[book1]sheet2!col(2)[10]
- This will activate Sheet2 in Book1; the tenth row of the second column will display at the top of the worksheet.
To display text that differs from the actual link, use this syntax:
InternalLink DisplayedText
Note the white space between the internal link and the displayed text.
For example, if you enter range://[book1]sheet2 Go to Book1 Sheet2, the words Go to Book1 Sheet2 will appear in the cell. When clicked, sheet2 of book1 will be activated.
Or use substitution notation to show 1st sheet name in active book as displayed text.
For more information on Range and Substitution, see these topics:
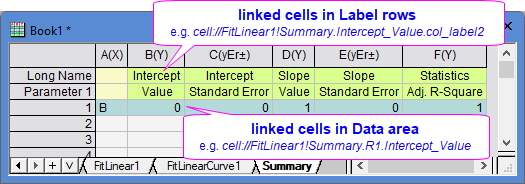
Inserting Links to Show Contents From Other Cell
Data Row
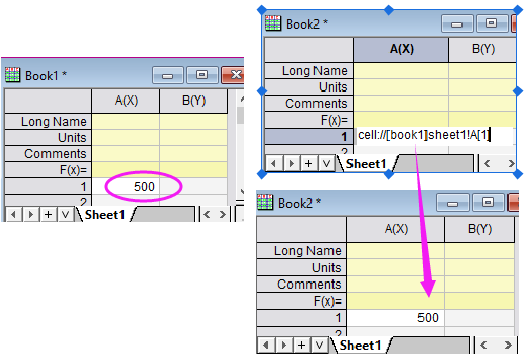
Show contents of another cell by cell://[BookName]SheetName/SheetIndex!ColumnName/Col(Name)[rowindex]
The following link will show A[1] content on Sheet1 in Book1.
- cell://[book1]sheet1!col(A)[1]
- cell://[book1]sheet1!A[1]
- cell://[book1]1!col(A)[1]
- cell://[book1]1!A[1]
Note:
- If using sheetindex, after pressing Enter, it will be automatically converted to sheet name. E.g. if you type cell://[book1]1!A[1] and later double click on it, it will show cell://[book1]Sheet1!A[1]
- When the cell is on the same sheet or different sheet on same book, The samebook and samesheet part(s) can be omitted. E.g. cell://col(A)[1] or cell://A[1] or cell://sheet2!A[1]
| Origin 2018 SR0 and later support a simplified notation for displaying numeric content from other cells and performing cell-level calculations. To learn more, see Using a Formula to Set Cell Values.
|
Label Row
Worksheet label rows are accessed using the characters as row indices.
- cell://[book1]sheet1!A[L]
- This link to Col(A)'s Long Name in worksheet [book1]sheet1
- cell://[book1]sheet1!A[P1]
- This link to Col(A)'s Parameter in worksheet [book1]sheet1
- cell://[book1]sheet1!A[D1]
- This link to Col(A)'s User-defined Parameter in worksheet [book1]sheet1
Refer to this LabTalk document for details of how to access to column label rows.
Inserting Links into Help Documents
To insert links to Origin Help documents, begin with help://, and then follow with the link to the Help page. For example:
Help://TUTORIAL.CHM/Tutorial/Import_Wizard.html
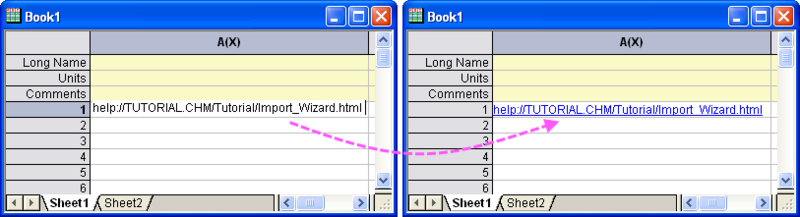
The link will become active when you finish editing, and will open in a web browser when clicked.
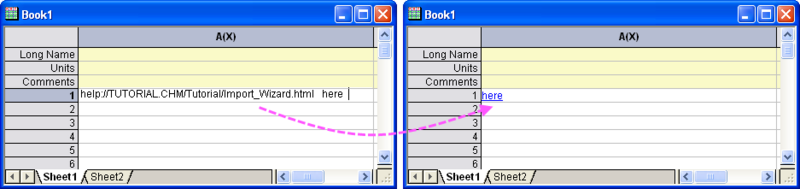
To insert a link with display text different from the URL, use the following syntax:
HelpLink DisplayedText
Note the white space between the Help link and the displayed text.
For example, if you enter help://TUTORIAL.CHM/Tutorial/Import_Wizard.html here, the word “here” appears in the cell. When clicked, a web browser opens to the Import Wizard page in the Origin Help document.:
Inserting Links to LabTalk Variables
To insert a link to a LabTalk variable, use the following syntax:
var://VariableName
The displayed value will change if variable value changes.
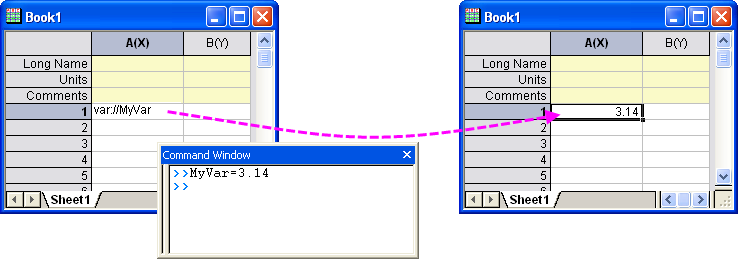
E.g. For numeric variable e.g. MyVar with value 3.14.
Enter var://MyVar to show 3.14 in worksheet cell.
Enter var://$(aa,.1) to show 3.1 (only 1 decimal places). See this for more numeric display format.
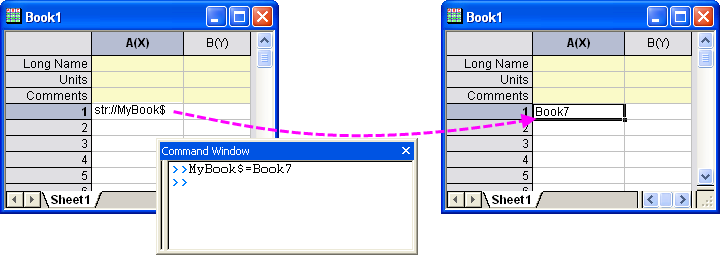
For string variable e.g. MyBook$ with value Book7. Enter var://MyBook$ in a worksheet cell, Book7 will show.
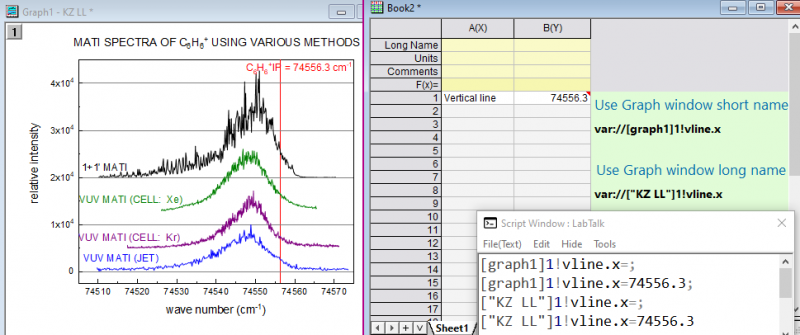
For object property in another window, add window name and layer or sheet name before the property. Both long name and short name are supported.
e.g. x value of vertical line object in Graph1's 1st layer. Enter var://[graph1]1!vline.x or var://["KZ LL"]1!vline.x. 74556.3 will show.
Note:
- To customize the display format, right click the cell and choose Format cell to e.g. set decimal places, etc.
Or enter cell formula e.g. =$([graph1]1!VLINE.X, .2) to show only 2 decimal places
- Since Origin 2023, when using window long name in notation, Origin will search windows in same folder to use first. This is helpful if user duplicate such folder or save such folder as opju and load in the future since in Origin window short name must be unique. If you so if you duplicate such folder or append the project in other project, the window short name definitely will be renamed if there is already window with such short name.
Inserting Links to Labtalk Strings
To insert a string variable, use the following syntax:
-
str://StringVariableName$
E.g. var://MyBook$ in above section can also be written as str://MyBook$
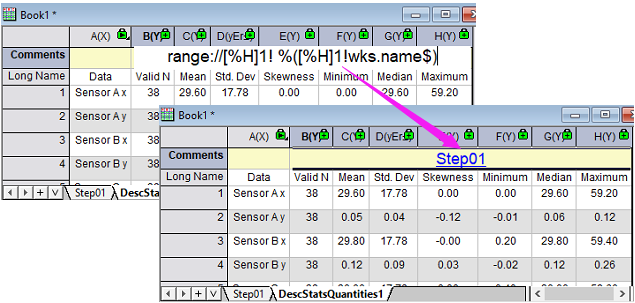
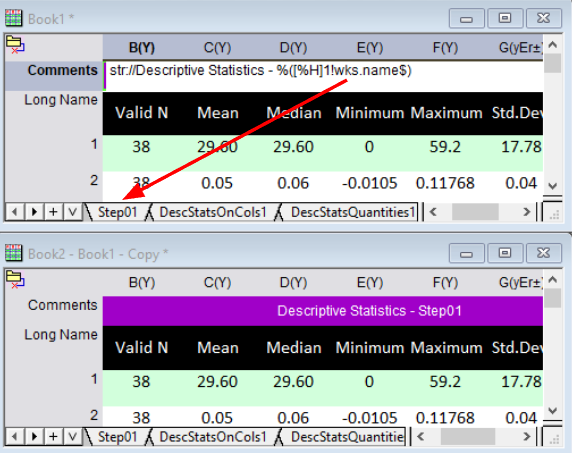
Another example: str://[%H]1!wks.name$ shows 1st sheet name on current book, e.g. "Step01", where %H refers to current book, 1! means 1st sheet. Change it to str://Descriptive Statistics - %([%H]1!wks.name$) to show Descriptive Statistics - Step01
 . .
| Note: These var:// and str:// notations only work with the old "col(N)" syntax -- not the newer spreadsheet cell notation that was introduced in Origin 2017 SR0.
Note that the older notation supports cell-level calculations using var:// as in:
var://max(col(A))*2 //find the max value in column A and multiply by 2
However, there is a new-and-improved notation for doing such cell-level calculations. For more information, see Using Formulas to Set Cell Values.
|
Inserting Links to Graph/Matrix/Notes Windows
Links to Graph Window
To manually add a link to a graph window into a worksheet cell, use the syntax:
graph://GraphName
This inserts a linked image of the graph into the cell. Double-clicking on the cell activates the graph window.

An easier method for linking to a graph window is to right-click on the worksheet cell and choose Insert Graph. This opens the InsertGraph dialog box. Expand the Options branch and disable Move Graph to cell [Embedding]. The advantage of this method is that you can choose other options for displaying the linked graph.
Links to Matrix Window
To add a link to a matrix window into a worksheet cell, use the syntax:
matrix://[MatrixBookName] // link to matrixbook

matrix://[MatrixBookName]MatrixSheetName! // link to matrixsheet

matrix://[MatrixBookName]MatrixSheetName!MatrixObjectNumber  // link to matrix object
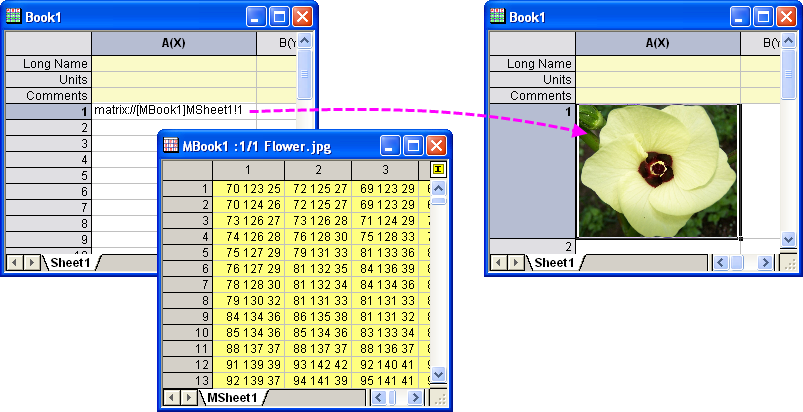
For example, there is a matrix object in matrixsheet of matrixbook, named [MBook1]MSheet1!1, then add matrix://[MBook1]MSheet1!1 into a worksheet cell, then this cell will show the image mode (like a thumbnail) of the matrix object. If double-click on this cell, the matrix object will be activated.
Links to Notes Window
To manually add a link to an existing Notes window into a worksheet cell, use the syntax:
notes://NotesName
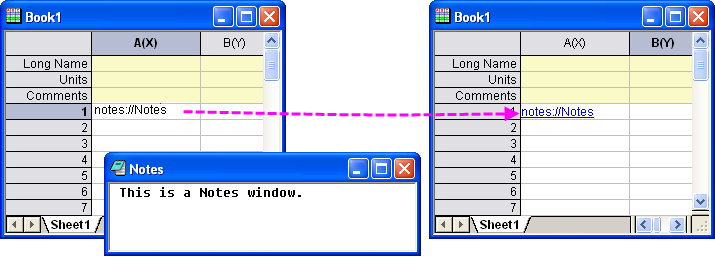
For example, there is a Notes window named Notes, then add notes://Notes into a worksheet cell, then a link is available to this Notes window. If click on this link, the Notes window will be activated.
To simultaneously create and link to a new Notes window, simply right-click on a worksheet cell and choose Insert Notes from the shortcut menu.
To insert a link with display text different from the URL, use the following syntax:
NoteLink DisplayedText
Inserting Links to Image Files
The following syntax is used to link an image file into a worksheet cell, and the image will display in the worksheet cell.
file://ImagePath
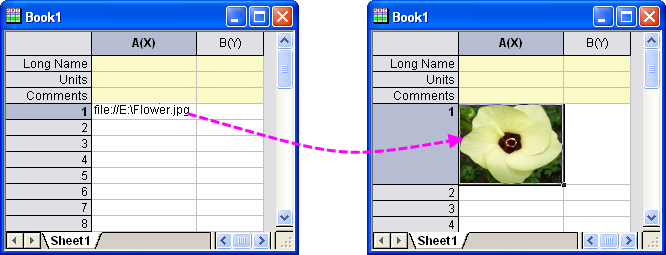
For example, there is an image file located in E:\ drive, and named Flower.jpg. Then add file://E:\Flower.jpg into a worksheet cell, and the image will show there.
| Note: There is an alternate way to link an image in a worksheet cell to an external image file and that is explained here under Image From File.
|
Inserting Path to File
Use the following syntax to link to an external file and open the file when the cell link is clicked:
path://FilePath DisplayedText
Examples:
path://"C:\Program Files\OriginLab\Origin2023\Samples\Import and Export\United States Energy (1980-2013).xls"
path://"C:\Program Files\OriginLab\Origin2023\Samples\Image Processing and Analysis\Car.bmp" "Show image of a Citroën 2CV"
Inserting Executable LabTalk Script
Use the following syntax to insert executable LabTalk script into a worksheet cell:
labtalk://Script DisplayedText
Examples:
labtalk://";type -b Hello World!"
In this example, we preceded the type command with a semi-colon (";"). This is only needed when the script opens a dialog box.
In another example, we use the short script in the cell to run a worksheet script:
- With a workbook active, press F4 to open worksheet Properties dialog. On the Script tab, enter the following in the edit box and click OK to close:
-
worksheet -a 3;
- Enter the following in an empty worksheet cell and when finished, press Enter:
labtalk://"worksheet -r" "Add 3 worksheet columns"
- Click on the displayed text and 3 columns will be added to the worksheet.
Note that while our example only ran a single line of worksheet script, it could have run a much longer and more complex script.
Related Topics
|