4.3.1 Arranging the Worksheet: Columns and RowsArrange-Wks
This page covers basic column and row manipulation.
Appending columns
To append columns to the worksheet, do one of the following:
- Select Column: Add New Columns (adds n columns).
- Click the Add New Columns
 button on the Standard toolbar (adds 1 column). button on the Standard toolbar (adds 1 column).
- Right-click inside the worksheet window, to the right of the worksheet grid and select Add New Column from the shortcut menu (adds 1 column).
Columns are added as Y column(s), to the right of the last worksheet column. Each new column is named alphabetically (A, B, C, ... X, Y, Z, AA, BB, CC, ...), starting with the first letter that is not already used as a worksheet column name.
Inserting columns
- To insert a column, highlight the column to the immediate right of the desired insertion point, then select Edit: Insert or right-click and select Insert from the shortcut menu. The new column is designated as a Y column, regardless of the designation of the highlighted column.
- To insert n columns in a specific location in the worksheet, repeat the above procedure n times or highlight n columns to the immediate right of the column insertion point and choose Edit: Insert or right-click and select Insert from the shortcut menu.
Deleting columns
- To delete one or more columns from the worksheet, highlight column(s) to be deleted, then select Edit: Delete or right-click and select Delete.
Note that when you delete columns (datasets) from the worksheet, any other visual representation of the datasets will also be deleted from the project. Thus, if you delete a column of data that also displays as a data plot in a graph window, the data plot is deleted from the graph window.
|
Note: To clear the column values but retain the columns, select Edit: Clear.
|
Inserting rows
- To insert a single row in a specific location in the worksheet, highlight the row that is directly below your desired insertion point and select Edit: Insert or right-click and select Insert from the shortcut menu.
- To insert n rows in a specific location in the worksheet, repeat the above procedure n times or highlight n rows to the beneath the row insertion point and select Edit: Insert or right-click and select Insert from the shortcut menu.
Deleting rows
- To delete one or more rows from the worksheet, highlight the row(s), then select Edit: Delete or right-click and select Delete.
|
Note: To clear the cell contents but retain the row(s), select Edit: Clear instead of Edit: Delete.
|
Moving columns/Rows
- To move a column or conjunctive columns to the left or to the right, highlight the column, then click the Move Left
 or Move Right or Move Right  buttons on the Column toolbar. buttons on the Column toolbar.
- To move a column to the first or last position in the worksheet, highlight the column, then choose Column: Move Columns: Move to Last or Column: Move Columns: Move to First. Or click the Move to Last
 or Move to First or Move to First  buttons on the Column toolbar. buttons on the Column toolbar.
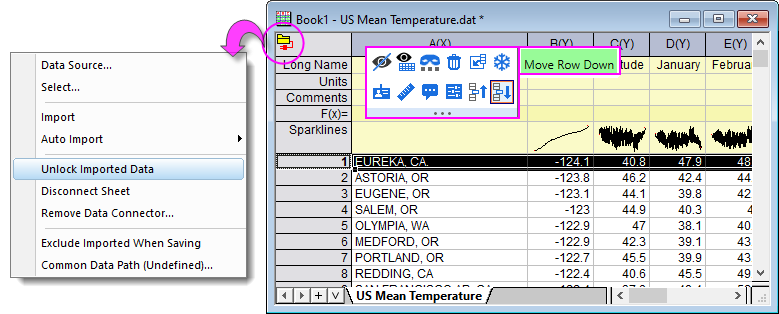
- To move a row or conjunctive rows up/down, highlight the row and select Move Row Up
 / Move Row Down / Move Row Down  button from mini toolbar. button from mini toolbar.
- Note that there are a couple of restrictions:
- If you have imported data using a Data Connector, you will have to click on the green Connector icon
 and Unlock Imported Data before you can move rows. and Unlock Imported Data before you can move rows.
- Analysis report sheets in which Recalculation is enabled do not allow moving of rows.
|
Note: Using Cut and Paste will only move the data, not the column or column attributes.
|
Changing column width
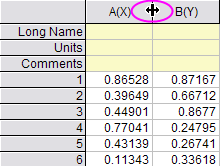
- To change the width of a column, point to the space between the column headings. When the pointer becomes a double-headed arrow, drag the edge of the column heading. Note that all selected columns are adjusted to a common width.
- Alternately, double-click on the column to open The Column Properties dialog box and enter your value in the Width field. This value is in units of characters (i.e. the max number of characters that will be displayed).
Changing the row header width and height
- To change the width of the row headings, double-click inside the worksheet window but to the right of the worksheet grid. In the Worksheet Properties dialog box, type the desired value in the Row Header Width text box. The text box value is in units of 1/10 of the text height.
- To change the height of the row headings, drag the row headers to change the height (affects only a single row at a time).
Transposing the columns and rows
- To transpose the columns and rows in the active worksheet, select Restructure : Transpose. This menu command exchanges the worksheet columns with rows, and the rows with columns.
If, prior to transposing, the worksheet contains more row values than columns, Origin adds the necessary columns to the worksheet during the transpose process. Origin names these added columns alphabetically, starting with the first letter that is not already used as a column name in the worksheet.
|
Note: To transpose the columns and rows in your worksheet, all columns in the worksheet must be of the same Format type. For example, each of the columns must be set to Text & Numeric or Numeric. The column Format is set from the Format drop-down list in the individual column's Properties dialog box (The Options node). Double-click on a column heading to open this dialog box for that particular column. In the default Origin worksheet, each column is set to the Text & Numeric Format type.
|
|