26.5.6 The Customize DialogThe-Customize-Dialog
Code Builder provides a tool call the Customize dialog to customize your own toolbar. To open this dialog, choose Tools: Customize... on the menu bar. There are two tabs in this dialog which will be discussed later.
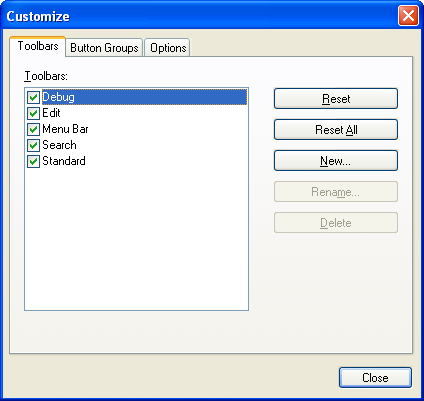
Toolbars Tab
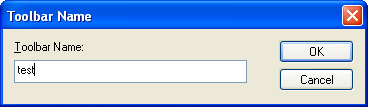
This tab is used to create or delete a custom defined toolbar. You can click the New... button to bring up the Toolbar Name dialog to specify a name for the new toolbar.
There are 6 toolbars in the Toolbars box by default, which are Debug, Edit, Menu Bar, Navigate, Search, and Standard. These default toolbars can NOT be renamed or deleted but you can edit buttons to change their functions. If you are not satisfied with the changes to these default toolbars, you can always click the Reset or Reset All button to restore the default toolbar settings.
You can also hide a toolbar in Code Builder by unchecking the box before the toolbar name.
There are 5 buttons on the Toolbars tab:

|
Reset the selected toolbar item, only works for default toolbars.
|

|
Reset all default toolbars.
|

|
Create a new toolbar by opening the Toolbar Name dialog.
|

|
Open the Toolbar name dialog to change the name for the selected toolbar.
|

|
Delete the selected toolbar, only works for user-defined toolbars.
|
 | It is also possible to go to the Button Groups tab and drag a button icon away from the dialog to directly create a new toolbar with the button on it.
|
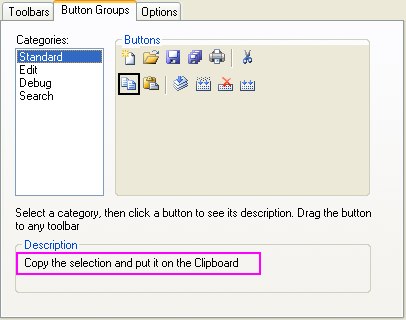
Button Groups Tab
In this tab all buttons are categorized into 4 categories.
To add a button to a toolbar, select a category and then drag-and-drop the button icon to the target toolbar. And to delete a button on the toolbar, drag-and-drop the button icon to the Buttons region in the Button Group tab.
When click on a button icon, its description will be displayed in the Description box.
|