27.6.3 The Button Settings Dialog BoxButtonSetting-Dialog
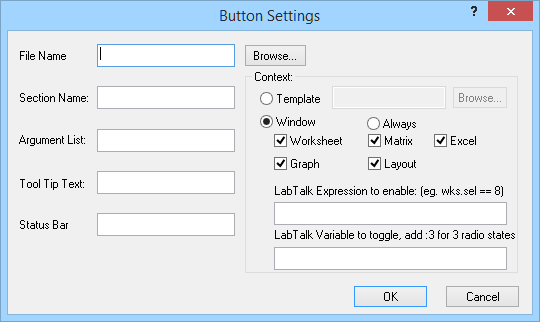
The File Name Text Box
Specify the LabTalk script file that contains the script for this button. You can specify a built-in script file or a custom script file that you or another Origin user created. Script files have the file name extension .OGS.
The script file is a text file that is organized in sections. Each of these sections is identified by the name of the section, surrounded by square brackets. This is a section from one of the .OGS files that is installed with your Origin software.
// Filename:  Arrow.ogs

// Creation:  10/31/1996

// Purpose:  Script to be called from the Arrow toolbar

//////////////////////////////////////////////////////////////////

[Horizontal]

select -toggle horz;

[Vertical]

select -toggle vert;
|
Note: To view an example LabTalk script file:
- Select File: Open.
- Select LabTalk Script (*.OGS) from the Files of Type drop-down list.
- Select a script file.
- Click Open.
For example, select ARROW.OGS. The script file opens in a LabTalk Editor window.
|
The Section Name Text Box
Specify the script file section name (without brackets) that contains the script for this button in the Section Name text box.
In the script file, section names are enclosed in brackets. For example:
[SectionName]
The Argument List Text Box
To pass the script file section an argument (or arguments), type the argument(s) in the Argument List text box.
Up to five arguments may be passed and must be space separated. Protect spaces within an argument with cotes or parentheses. All arguments are passed as text with any text substitution occurring before being passed to the script:
Example ( Assume %A = "myvar" and myvar = 3 ) :
"one is the first" %A $(%A) $(pi) (five is the fifth argument)
gets passed the script as these five text strings :
"one is the first" "myvar" "3" "3.14159" "five is the fifth argument"
The Tool Tip Text and Status Bar Text Boxes
Specify the ToolTip and status bar messages for the button in the respective text boxes.
The Context Group
You can restrict a button's availability to instances when the active window is (a) created from a particular template or (b) is of a particular window type.
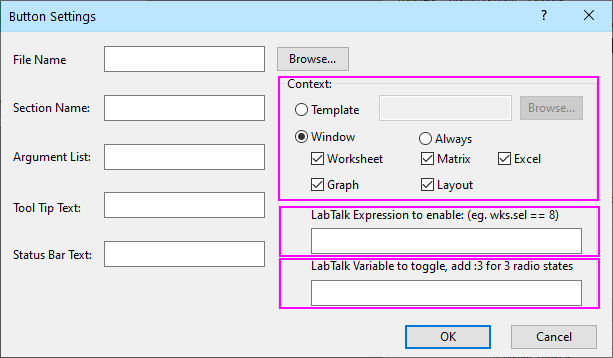
LabTalk Expression to enable
You can further restrict a button's availability based on the value of a specified variable or test condition. Do this by typing the variable name or a test condition in the LabTalk Expression to enable text box.
To determine button availability, Origin first checks template and window type restrictions. If the button passes these criteria, Origin checks to see if a variable or object property has been associated with the button.
- Variable Name: If you enter a variable name in the LabTalk Expression... text box, Origin checks the current numeric value of the variable. If the current variable value is zero (0), Origin disables the button. Otherwise, Origin enables the button. For example, if you enter ...
wks.sel
... then whenever there is a selection in the worksheet, wks.sel will be non-zero, and the button will be enabled.
- Test Condition: If you enter a test condition in the LabTalk Expression... text box, Origin checks to see if the test condition is False (zero) or True (non-zero). If the test condition is False, Origin disables the button. If the test condition is True, Origin enables the button. For example, if you enter ...
wks.sel == 8
... then whenever a range of data is selected in the worksheet, this condition will be True and the button will be enabled.
LabTalk Variable to toggle:
A button can be made to show different states using different icons, using the LabTalk Variable to toggle text box. For example, if you enter ...
state:3
... then the button will use the selected icon, plus the two following in the bitmap based on the value of LabTalk variable state rounded by 3.
The following is a special case: if you entered ...
state:1 or state
... then the button will toggle between the "button-up" (not pressed) and "button-down" (pressed) states.
Note that the button will be disabled if LabTalk variable state is not defined or the value is missing, and the toggle variable will be passed as an extra argument at the end of the argument list internally.
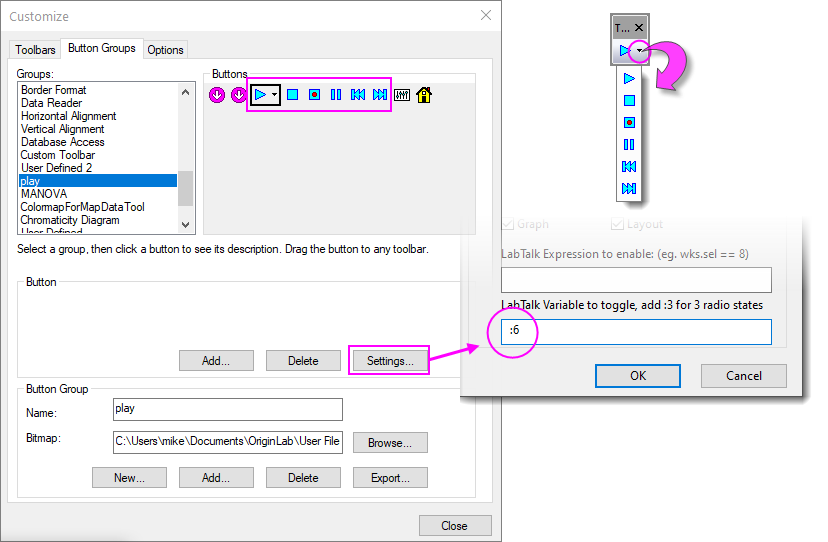
Split Buttons: adding a drop-down menu to a button
A custom button can display a drop-down button using a syntax similar to that shown for the state variable mentioned above, but leaving out the variable state.
For instance, to attach a six-button drop-down menu to the the selected custom button (select a button under Buttons and click Settings), you would enter ...
:6
... in the LabTalk Variable to toggle field. The menu will use six icons (the current icon plus the next five) to generate the drop-down list.
|