4.5.2.1 Worksheet QueryExtract-Wks-Data
Summary
This tutorial will show you how to use the Worksheet Query dialog.
Minimum Origin Version Required: Origin 2019b
What you will learn
This tutorial will show you how to:
- Extract numeric and time data
- Use an alias in an extraction condition
- Use LabTalk functions in an extraction condition
Dialog Overview
 | The Worksheet Query dialog box will differ slightly from the image below if (a) Spreadsheet Cell Notation (SCN) is OFF in the active workbook (you see this icon  in the upper-left corner of the workbook), or (b) you have SCN turned ON but you have checked the Use Alias box in the upper-right corner of Worksheet Query. The Worksheet Query dialog box was modified for version 2019b to allow for more flexible column naming. You can still work through this tutorial by defining column Aliases. See Select Column Variables for If Test, for guidance. in the upper-left corner of the workbook), or (b) you have SCN turned ON but you have checked the Use Alias box in the upper-right corner of Worksheet Query. The Worksheet Query dialog box was modified for version 2019b to allow for more flexible column naming. You can still work through this tutorial by defining column Aliases. See Select Column Variables for If Test, for guidance.
|
There are two main panels in the Worksheet Query dialog:
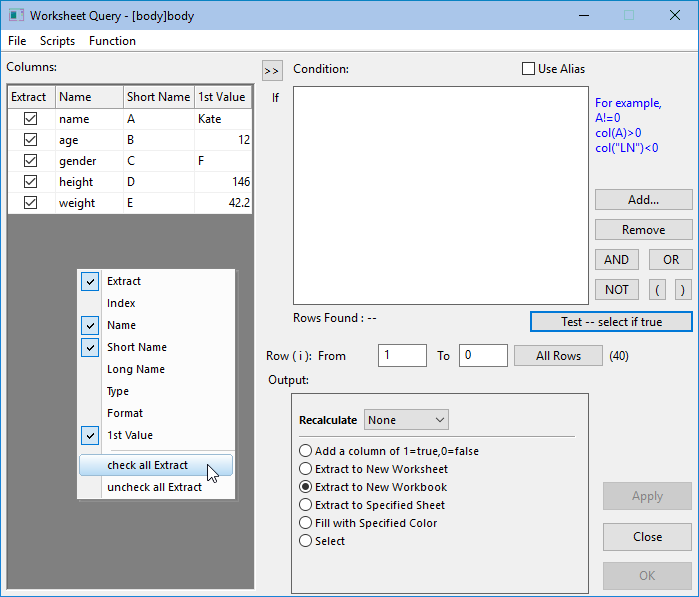
- The left panel lists all the columns in the active worksheet. Right-click in the left panel and choose which column properties to display (e.g. Format, 1st Value, etc). Note that only those columns checked in the Extract column will be output when you click OK in the dialog box.
- The right panel is where you set, test and execute query conditions. If SCN is off or you have opted to check the Use Alias box, select those worksheet columns that you want to use in the extract condition in the left panel, then click the
 button to move them into the Select Column Variable for If Test box. You will then have the Aliases that you need to define your Condition. If you intend to use column names or indices instead of Aliases, you can simply define your Condition directly. button to move them into the Select Column Variable for If Test box. You will then have the Aliases that you need to define your Condition. If you intend to use column names or indices instead of Aliases, you can simply define your Condition directly.
Define the Condition
Extract Numerical Data
- Start with a new workbook and import the file \Samples\Statistics\body.dat.
- Click the menu item Worksheet: Worksheet Query to open the Worksheet Query dialog box.
If you know the correct syntax, you can type your expression directly into the Condition box. To aid you in constructing your expression, you can use the buttons to the right side of Condition. Additionally, you can insert functions and variables from the Function menu.
- To extract the data of individuals who are at least 160cm in height, type the following into the Condition box:
col(height)>=160
- When there are multiple conditions, you can combine these conditions using logical operators AND, OR, NOT. We will add a second condition that tests for individuals that weigh no more than 50kg. Click the AND button and type the following after AND:
col(weight)<=50
Your expression should now look like this:
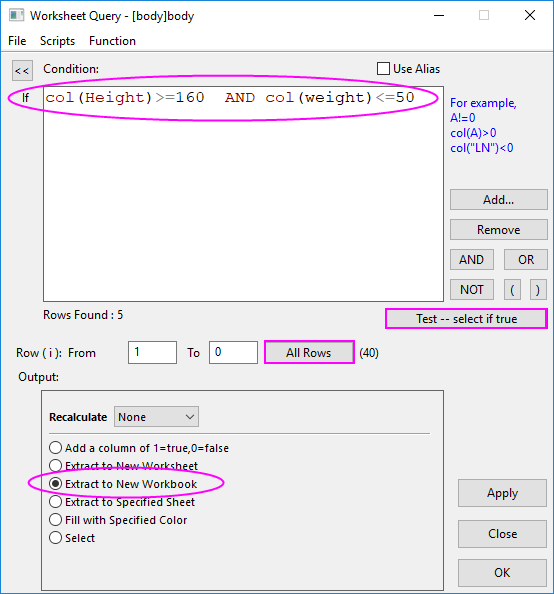
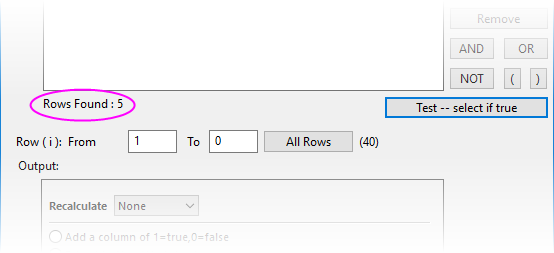
- To test your query, click the All Rows button to select all rows (note that the 0 in 1 To 0 signifies the last row in the sheet), then click Test -- select if true to test your expression. Origin will return 5 records found.
- Accept other default settings and click the OK button. A new workbook containing the 5 found records, is created.
Extract Strings
When extracting strings, you need to enclose the string with double quotes (e.g. "California").
- In order to extract just female (F) subjects, we type the following into the Condition box:
col(gender) == "F"
- Click the All Rows button, then click Test -- select if true. A message shows that 18 records are found.
- Accept other defaults and click the OK button to close the dialog and extract data for female subjects to a new workbook.
Extract Time Data
Date and Time data are internally saved as numeric values in Origin. Date is the integer part of the numeric value, while Time is the fractional part. You can use the int() and frac() functions to return the integer and fractional parts of a number, and use the Date(MM/DD/YY) and Time(HH:mm:ss) functions to convert date-time string data to numeric Julian day data.
- Start with a new workbook. Select Help: Open Folder: Sample Folder... to open the "Samples" folder. In this folder, open the Import and Export subfolder and find the file Custom Date and Time.dat. Drag-and-drop this file into the empty worksheet to import it. Note that the "date-time" data in column A is left-aligned, indicating that it is being treated as text strings and not as true date-time data (which is numeric).
- Select column A, right-click and select Properties. Set Format = Date, Display = Custom Display and in Custom Display enter the following:
dd'.'MM'.'yyyy HH':'mm':'ss'.'##
This formats the date-time strings in column A as date-time numeric data.
- Next, we will extract that portion of worksheet data that falls within the time period 10:00:00 and 11:00:00. Click Worksheet: Worksheet Query and in the Condition box, enter the following:
frac(A) > Time(10:00:00) AND frac(A) < Time(11:00:00)
- Click the All Rows button, then click Test -- select if true. A message shows that 120 records are found.
- Accept other defaults and click the OK button to close the dialog and extract data recorded between 10:00:00 and 11:00:00 to a new workbook.
| You could have imported the data in step 1, using a Data Connector. A simple drag-and-drop of the data file Custom Date and Time.dat would have split the date and time data into two columns, each formatted properly as Date and Time. This saves you the trouble of having to manually format the data using the string in step 2.
|
|