4.3.12 Sound Processingsound-processing
Summary
Origin features some useful signal processing tools, such as smoothing, FFT filtering, and spectral analysis tools like the Fast Fourier Transform (FFT) . These can be useful for performing sound analysis. This tutorial will remove a specific noise from an audio signal (.WAV file) based on the spectral range of the noise.
Minimum Origin Version Required: Origin 9 SR0
What You Will Learn
- Import a sound file (.WAV) into Origin.
- How to view sampling interval information.
- How to use FFT gadget to check the frequency spectra of a signal.
- Perform FFT filter on the audio signal.
- Export a filtered signal as a .WAV file.
Steps
In this tutorial, we will use "Origin8 Message.wav" and "Dial Tone.wav" which can be found under the subfolder "\Samples\Signal Processing\" of the Origin installation folder.
Play the sound file "Origin 8 Message.wav" and you will hear a dial tone noise in the background. The 2nd file is a recording of the dial tone.
- Start Origin, and create a new project with an empty worksheet in a workbook.
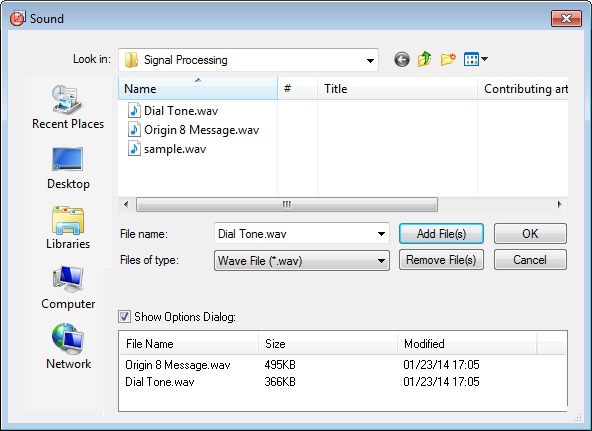
- Select menu File: Import: Sound (WAV)... to open the Sound dialog. (Hint: if this menu item is not shown, select menu File: Import: Customize... to open the Import Menu Customization dialog to add it.) Navigate to the "\Samples\Signal Processing\" folder and double click "Origin 8 Message.wav" and "Dial Tone.wav" to add them to the import list. Make sure Show Options Dialog is checked and click OK.
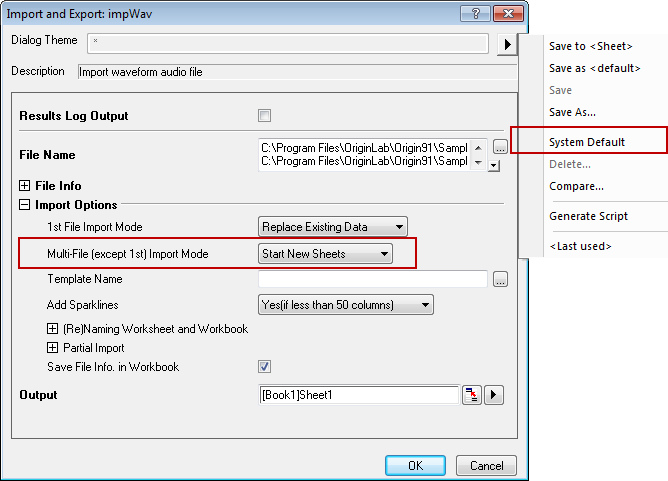
- In the Import and Export: impWav dialog, click the triangle button to to the right of Dialog Theme, and select System Default from the context menu. Then expand Import Options node, change Multi-File (except 1st) Import Mode to Start New Sheets.
- Click OK to import the two sound files into two worksheets:
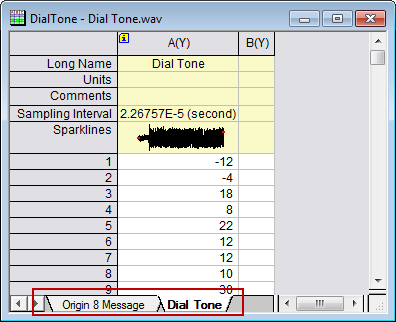
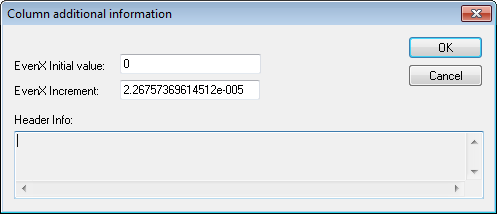
- In each worksheet, we can see the Sampling Interval has the same value of 2.26757E-5 (second). Click the i icon in the top left corner of the column and the Column additional information dialog pops up with the sampling interval information. Click OK to close this dialog.
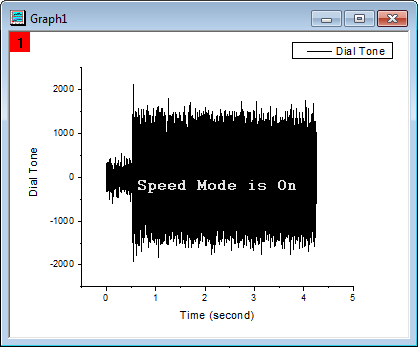
- With Dial Tone worksheet activated, highlight column A, and select menu Plot: Line: Line to make a line plot.
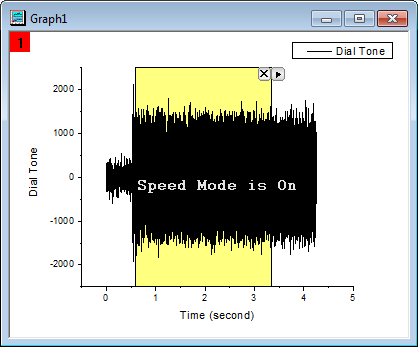
- Using this graph, select menu Gadgets: FFT... to open the Data Exploration: addtool_curve_fft dialog. Using the default settings, click OK button to perform an FFT of the data and create the FFTPREVIEW graph with the results.
 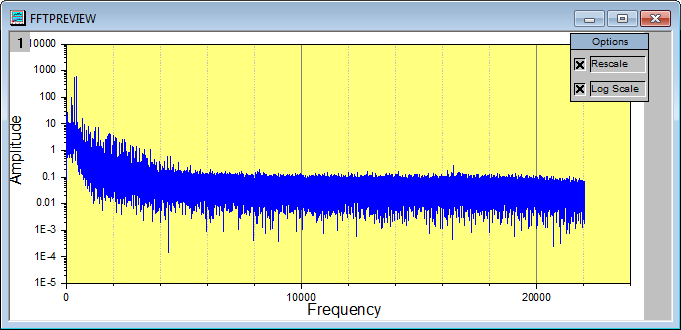
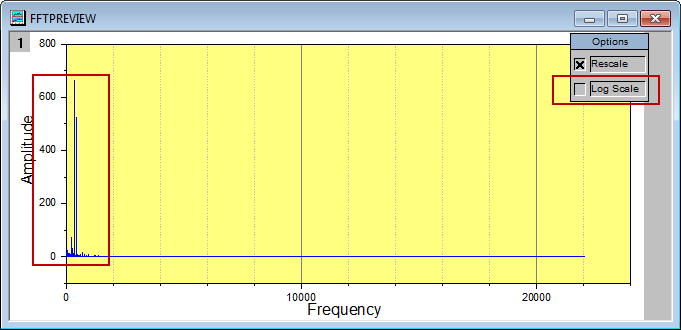
- Uncheck the Log Scale checkbox on the FFTPREVIEW graph, and then select menu Graph: Rescale to Show All to rescale the graph. We can see that the distribution of frequency is mainly under 2000 Hertz with the largest peaks being under 500 Hertz.
- Activate the worksheet Origin 8 Message and highlight column A. Select menu Analysis: Signal Processing: FFT Filters to open the Signal Processing: fft_filters dialog. In the dialog, change Recalculate to None, select High Pass for Filter Type, uncheck the Auto checkbox for Cutoff Frequency and change value to 500. Clear Keep DC Offset checkbox. We can auto preview the result by ticking the Auto Preview checkbox at the bottom, and the result will be shown in the right panel, which can be shown or hidden by using the button in the bottom right corner of the left panel.
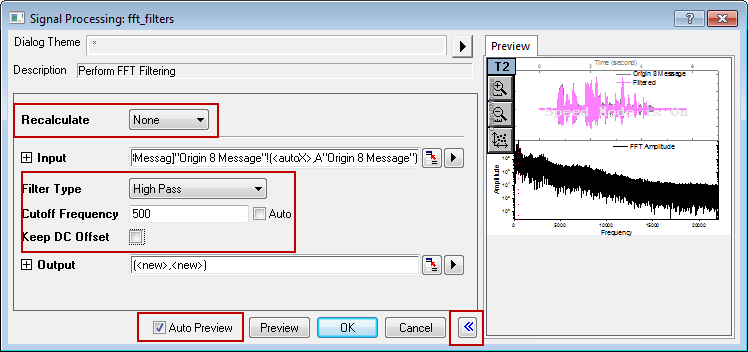
Note: If Recalculate is not None, the results need to be copied to new columns without the recalculate lock for changing the Data Type, see step 11 below.
- Click OK to generate the results. We can see that the filtered result is in floating point format. In order to create a new WAV file, we need to convert this to an integer format.
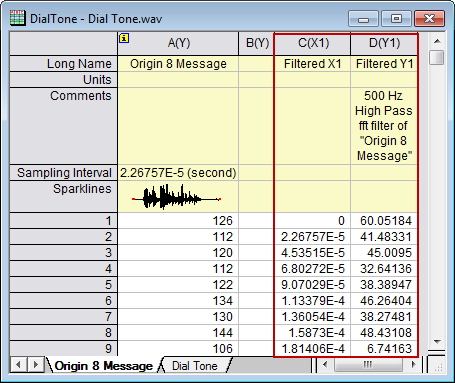
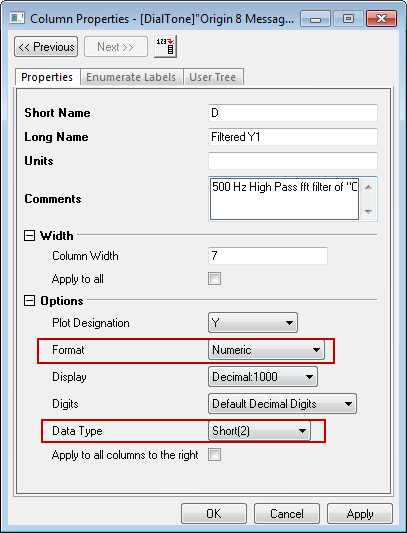
- Highlight column D (the filtered result column), and then choose Properties... item from the right-click context menu, to open the Column Properties dialog. In this dialog, expand Options node, set Format to Numeric, then change Data Type to Short(2). Click OK to apply these settings to column D and close this dialog.
- Keeping column D highlighted, select menu File: Export: Sound (WAV).... In the open dialog, enter a file name (such as Origin 8 Message_filtered.wav) and save to a familiar location. Make sure the Show Options Dialog checkbox is ticked.
- Click Save button and the Import and Export: expWAV dialog pops up. Clear the Auto checkbox for Column, and change it to 4.
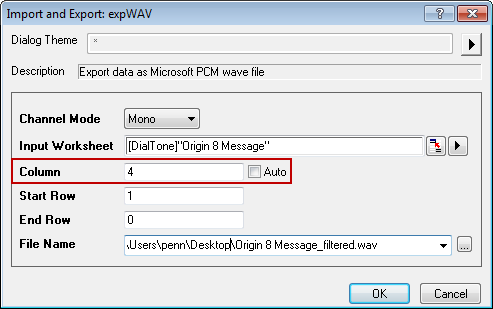
Note: The Column is specified for the Y column, and Origin will find its sampling interval if exists or its associated X column. If no X column or the X column is not even spacing, there will be error messages.
- Click OK to export column D as a wave file. Now you can play this wave file and hear that the dial tone has been removed. Note that information with the same spectra as the dial tone is also removed.
|