11.2.4 Organizing and Accessing Origin C FunctionsOrganize-Access-OC-Func
Summary
Techniques for using your Origin C functions.
Minimum Origin Version Required: Origin 8.0 SR0
What you will learn
This tutorial will show you how to:
- Save your Origin C Function with your Project
- Associate your Programs with Visual Objects
- Load and Compile your Origin C Function from script
Saving your Origin C Function with your Project
One way to load and compile your Origin C function is to save the Origin C file as an attachment to your Origin Project (*.OPJ) file. When a project file is opened, all files attached to it are separated out and stored in a temporary folder. In addition, any Origin C file that was attached is also automatically loaded into the Code Builder workspace, and compiled. The function is then ready to be called upon opening the Origin Project file.
- Start a new Origin project file by clicking on the New Project button
 on the Standard Toolbar. on the Standard Toolbar.
- On the Standard Toolbar, click the Code Builder button
 . .
- From the Code Builder menu, select File: New. This opens the New File dialog box.
- In the top list-box, select C File.
- In the File Name text box, type: Test. Keep the Add to Workspace check box selected. Click OK. The file Test.c is added to the workspace.
- Select and copy the following function, and paste it into the Test.c file. Be sure to paste the text below the line that reads "//start your functions here."
void Plot_Data(string strTemplate, string strData)
{
	// Create a graph window from a Template
	GraphPage gp;
	BOOL bOK = gp.Create(strTemplate, CREATE_VISIBLE);
	if( !bOK )
		return;

	// Attach the first layer (0) to a GraphLayer object
	GraphLayer gl = gp.Layers(0);

	//Attach a dataset to a Curve object
	Curve crv(strData);

	// Add the Curve to the graph layer
	int nPlot = gl.AddPlot(crv);
	if(nPlot >= 0)
	{
		// Set plot color to Green(2)
		gl.DataPlots(nPlot).SetColor(2, TRUE);

		// Rescale this graph layer
		gl.Rescale();
	}
}
The Plot_Data function takes two arguments: (1) the template name and (2) the name of a Y dataset to include (plot) in the layer.
- Click the Build button
 to compile and link the file. to compile and link the file.
- Drag-and-drop the file Test.c from the User subfolder branch of the Workspace tree, to the Project subfolder. (Hint: You may need to first expand the User subfolder branch to display the Test.c entry prior to dragging the file).
- Go back to the Origin interface and save the project by clicking the Save button
 on the Standard Toolbar. Give the project the name Test.OPJ, and save it in a location of your choosing. on the Standard Toolbar. Give the project the name Test.OPJ, and save it in a location of your choosing.
- The Origin C file, Test.c, is now saved with the Project. To verify this, close the project, and go back to Code Builder. You will see that there are no entries under the Project subfolder of the Workspace tree. Now go back to Origin interface and reopen the project. Go to Code builder and verify that Test.c is now listed under the Project subfolder (Hint: you may need to expand the Project subfolder branch to see the Test.c entry).
Associating your Programs with Visual Objects
You will now learn how to create a button on a worksheet and program the button to call the Origin C function in the Test.c file that you saved with the project.
- Open the Test.OPJ project that you saved under step 9 (previous section).
- Highlight the A(X) and B(Y) columns, right-click and select Fill Columns With: Row Numbers.
- From the menu, select Format: Worksheet to open the Worksheet Properties dialog box.
- In the Size tab, Worksheet Measurement branch, set the Gap from Top to 40 and click OK to close the dialog.
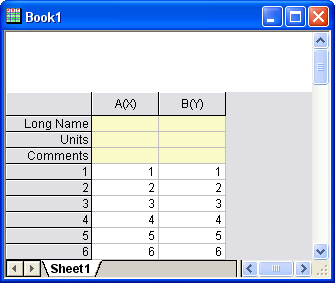
The worksheet now has sufficient space above the column headings to add a text label.
Right-click in the area directly above the two columns and choose Add Text.
- At the cursor, type: Plot Data.
- Click once outside the text label to deselect it.
- Right-click on the text label and choose Programming Control to open the Programming Control dialog box. (Hint: Please choose Label Control in Origin 7.5)
- From the Script, Run After drop-down list, choose Button Up.
- Type the following script in the text box at the bottom of the dialog box:
Plot_Data("scatter","book1_b");
- Click OK.
Your text label will now look like a button.
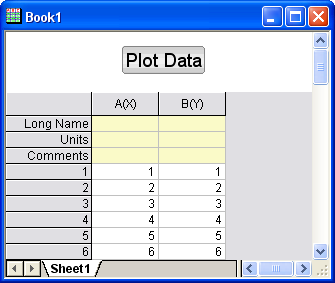
- Click the Plot Data button on your worksheet.
- The Plot_Data function in your Test.c file is called, and a scatter plot is created.
| Notes: The script behind the button assumes that you have data in column B(Y) of the Data1 worksheet and that there is an associated X data set.
|
Loading and Compiling your Origin C Function from Script
In this tutorial we learned how to save an Origin C function along with the project file and then access the function from the Origin interface. Saving an Origin C file with a project limits access to functions within that file to only that project. When a new project is opened, the functions are not available any more.
To access functions in an Origin C file that is saved on disk, the file can be programmatically loaded and compiled using LabTalk script. The script command for performing the programmatic load and compile is run.LoadOC. Refer to the LabTalk Help files (Help: Programming: Labtalk) for more information on using this command.
This concludes the Origin C Functions tutorial.
|