1.1.1 Creating a Simple X-Function
X-Function BuilderX-Functions are created with X-Function Builder. You can open X-Function Builder by choosing the Tools: X-Function Builder... menu.
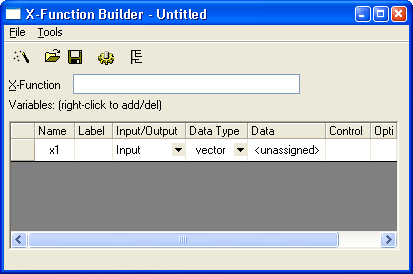
The X-Function Builder dialog is shown below.
X-Function, CreateCreating X-Function
The steps below will walk you through the creation of an X-Function that will perform the task of copying data from one column to another column.
- Select Tools: X-Function Builder... menu to open the builder.
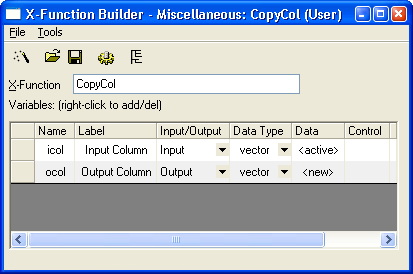
- Enter X-Function name CopyCol in X-Function box
- Each variable and parameter of the X-Function should be on its own row. Right-click on the gray area below the table and choose Add Variable to add another more row.
- This X-Function needs 2 variables to specify the input and output columns. Fill it out like the image below. Most columns are self-explanatory.
- The Data column is for setting the default value. <active> means current selected column, <new> means new column. If set as shown, Calling CopyCol will copy current selected column to new column by default.
- Click
 button to save the X-Function. The very first time you create an X-Function, the following reminder shows to copy the whole X-Function folder structure from system X-Functions area to your User-Files Folder. Choose the 2nd radio so that it will not popup again.
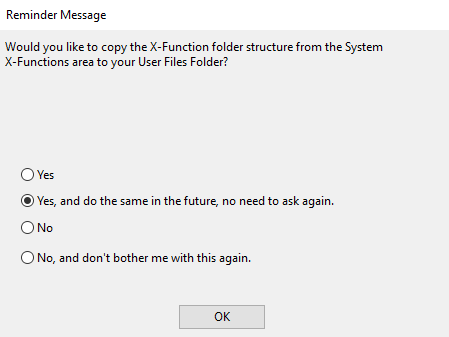
- When the Save As dialog appears, navigate to X-Functions to see the whole X-Function folder structure. Pick an appropriate folder. E.g. CopyCol X-Function is to copy columns in worksheet. So pick Data Manipulation > Worksheet folder to save the file. Usually the file name is the same as the X-Function name. So just click the Save button.
- Click the
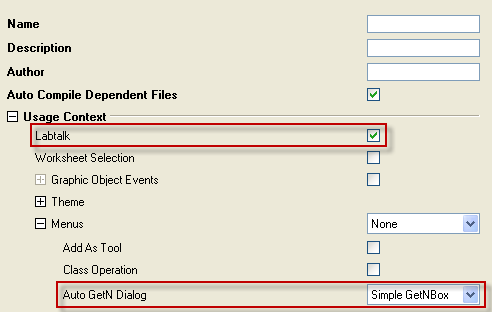
 button to switch to the tree view. X-Function, Control Labtalk Accessing Make sure the Labtalk check box is checked so that so the X-Function can be used in the Script and Command Windows.
- Set Auto GetN Dialog to Simple GetNBox. The Auto GetN Dialog provides the choice to use the X-Function with or without dialog and what type of dialog. Click Save button again to save the change.
- Now we need to write the Origin C code that will do the work for our X-Function. Click on the Code Builder button
 . This will open the X-Function in Code Builder where we can write our Origin C code. In the main function, add the following Origin C code:
ocol = icol;
- Click the Compile button and then click the Return to Dialog button to go back to X-Function Builder. Click button again.
- Close the X-Function builder tool.
- You can always reopen the tool and choose Open button to load a created X-Function to edit further.
X-Function, ExecutionUsing X-Functions
Now that we have successfully created our X-Function, we can test it.
- Create a new a worksheet with two columns. Fill column A and B with random numbers.
- Highlight Column A by clicking the A(X) header.
- In the Script or Command Window enter the X-Function name CopyCol without any variables after it and press Enter key to execute it with default settings.
- It will create a new column and copy column A data to it.
- Now highlight column B.
- In Script window, enter CopyCol -d and press Enter key to open the X-Function with dialog.
- This will open a Simple GetN style dialog as we specified when building the X-Function. The input and output are loaded with our default settings. Click the OK button.
- It will create a new column with column B value copied.
See X-Functions for more explanation of X-Function and how to call it.